Overview
- Login to your NYU account on Zoom and record your lecture
- Ensure that your Internet connection is stable
- Record in a quiet, well-lit location
- Frame yourself properly on camera to make your recording look as professional as possible
- Turn on settings for recordings to be downloadable
Feel free to use a GPH Presentation template (link one, link two) or if you prefer not to, please make sure slides are clean and try to maintain some sort of design consistency. If you would like help with crafting your powerpoint or layout reformatting, please email the TEE team at tee-gph@nyu.edu.
Ideally, video lectures should be kept to under 20 minutes at a consistent, engaging pace. As you prepare your presentations, try "chunking" your content into shorter, self-contained segments. Keep your specific learning objectives in mind for each segment to ensure every chunk directly targets a key outcome.
To boost student engagement and retention, build in brief pause points where students can jot down notes, respond to a prompt, or answer a quick reflection question. These active learning breaks support self-assessment and create a more personalized learning experience.
Pro Tip for Sustainability: Keep your recorded lectures "evergreen" by avoiding references to specific dates, current events, or temporary course logistics. Written text in Brightspace can be placed and updated with relevant, contemporary content alongside your videos so you don't have to re-record every year!
Best Video Lecture Recording Practices
1. Pre-Production & Pedagogical Design
- Chunk Content (10–15 Min Max): Aim for short, modular videos centered around 1–2 core learning objectives. Attention and retention drop significantly after 6–10 minutes.
- Script or Outline: Avoid full reading (which sounds robotic), but use a bulleted script or teleprompter app to avoid tangent-heavy "ahs" and "ums."
- Design "Evergreen" Content: Avoid mentioning specific dates, assignment deadlines, or semester-specific news in the video itself. Place dynamic updates in Brightspace.
2. Audio Quality (Priority #1)
Note: Viewers will tolerate mediocre video quality, but bad or echoing audio causes immediate fatigue.
Option A: Using Your Computer's Built-In Microphone
No extra gear needed! Your laptop or desktop microphone works wonderfully with just a few quick environment tweaks:
- Maintain the Proper Distance: Sit about arm’s length from your screen so your microphone captures your natural speaking volume clearly without needing to shout.
- Soften the Room: Hard walls reflect sound. Record in a carpeted room or near curtains to eliminate hollow room echo and make your voice sound warmer.
- Silence Background Noise: Mute desk fans, turn off humming air conditioners, and close doors and windows before pressing record.
Option B: Using an External Microphone
If you have a USB desktop mic, headset, or lapel/lavalier microphone, use these setup tips for maximum clarity:
- Optimize Placement: Keep desk or lapel mics 4-6 inches from your mouth, positioned slightly off-center to reduce popping "P" and "T" sounds (plosives).
- Verify Your Input: Before recording, check your recording software settings to ensure your external mic is selected as the primary audio source rather than the built-in mic.
- Treat the Space: Even high-end microphones pick up room echoes—recording near soft surfaces (rugs, bookshelves, upholstered furniture) keeps the audio crisp and direct.
3. Lighting & Framing
Aspect | Best Practice | What to Avoid |
Light Source | Face a bright, natural window or place a ring light / softbox behind your camera. | Backlighting (sitting with a bright window behind you). |
Eye Level | Raise your webcam/laptop to eye level using books or a stand. | Angling the camera upward under your chin. |
Framing | Head and shoulders in frame (Rule of Thirds), leaving slight headroom at the top. | Sinking to the bottom of the frame or sitting too far back. |
4. Active Engagement & Delivery
- Look at the Lens: Treat the camera lens like a student's eyes—not your screen or preview box.
- Stand or Adjust Posture: Standing (or sitting upright) naturally improves vocal energy and posture.
- Incorporate Active Breaks: Prompt students to pause the video to write down thoughts, answer a question, or reflect before continuing.
5. Screen & Slide Presentation
- Clean Up the Desktop: Hide clutter, close unnecessary tabs, and mute all desktop notifications (Do Not Disturb mode).
- High Contrast Slides: Use large, readable fonts with high contrast between text and background. (Template links are at the outset of this document. If you would like help with crafting your powerpoint or layout reformatting, please email the TEE team at tee-gph@nyu.edu.)
- Use Visual Anchors: Don't just read slide text—use cursor highlighting, telestrators, or diagrams to point to key elements as you speak.
How use Zoom to record your lecture presentations
Before you record any lecture presentation, please login to your Zoom account at https://nyu.zoom.us/ and click on Settings in the left navigation menu. Click on the tab Recording to see the following settings. Check all the boxes as shown in the image below. Checking these settings will only need to be done once, unless changes are needed.
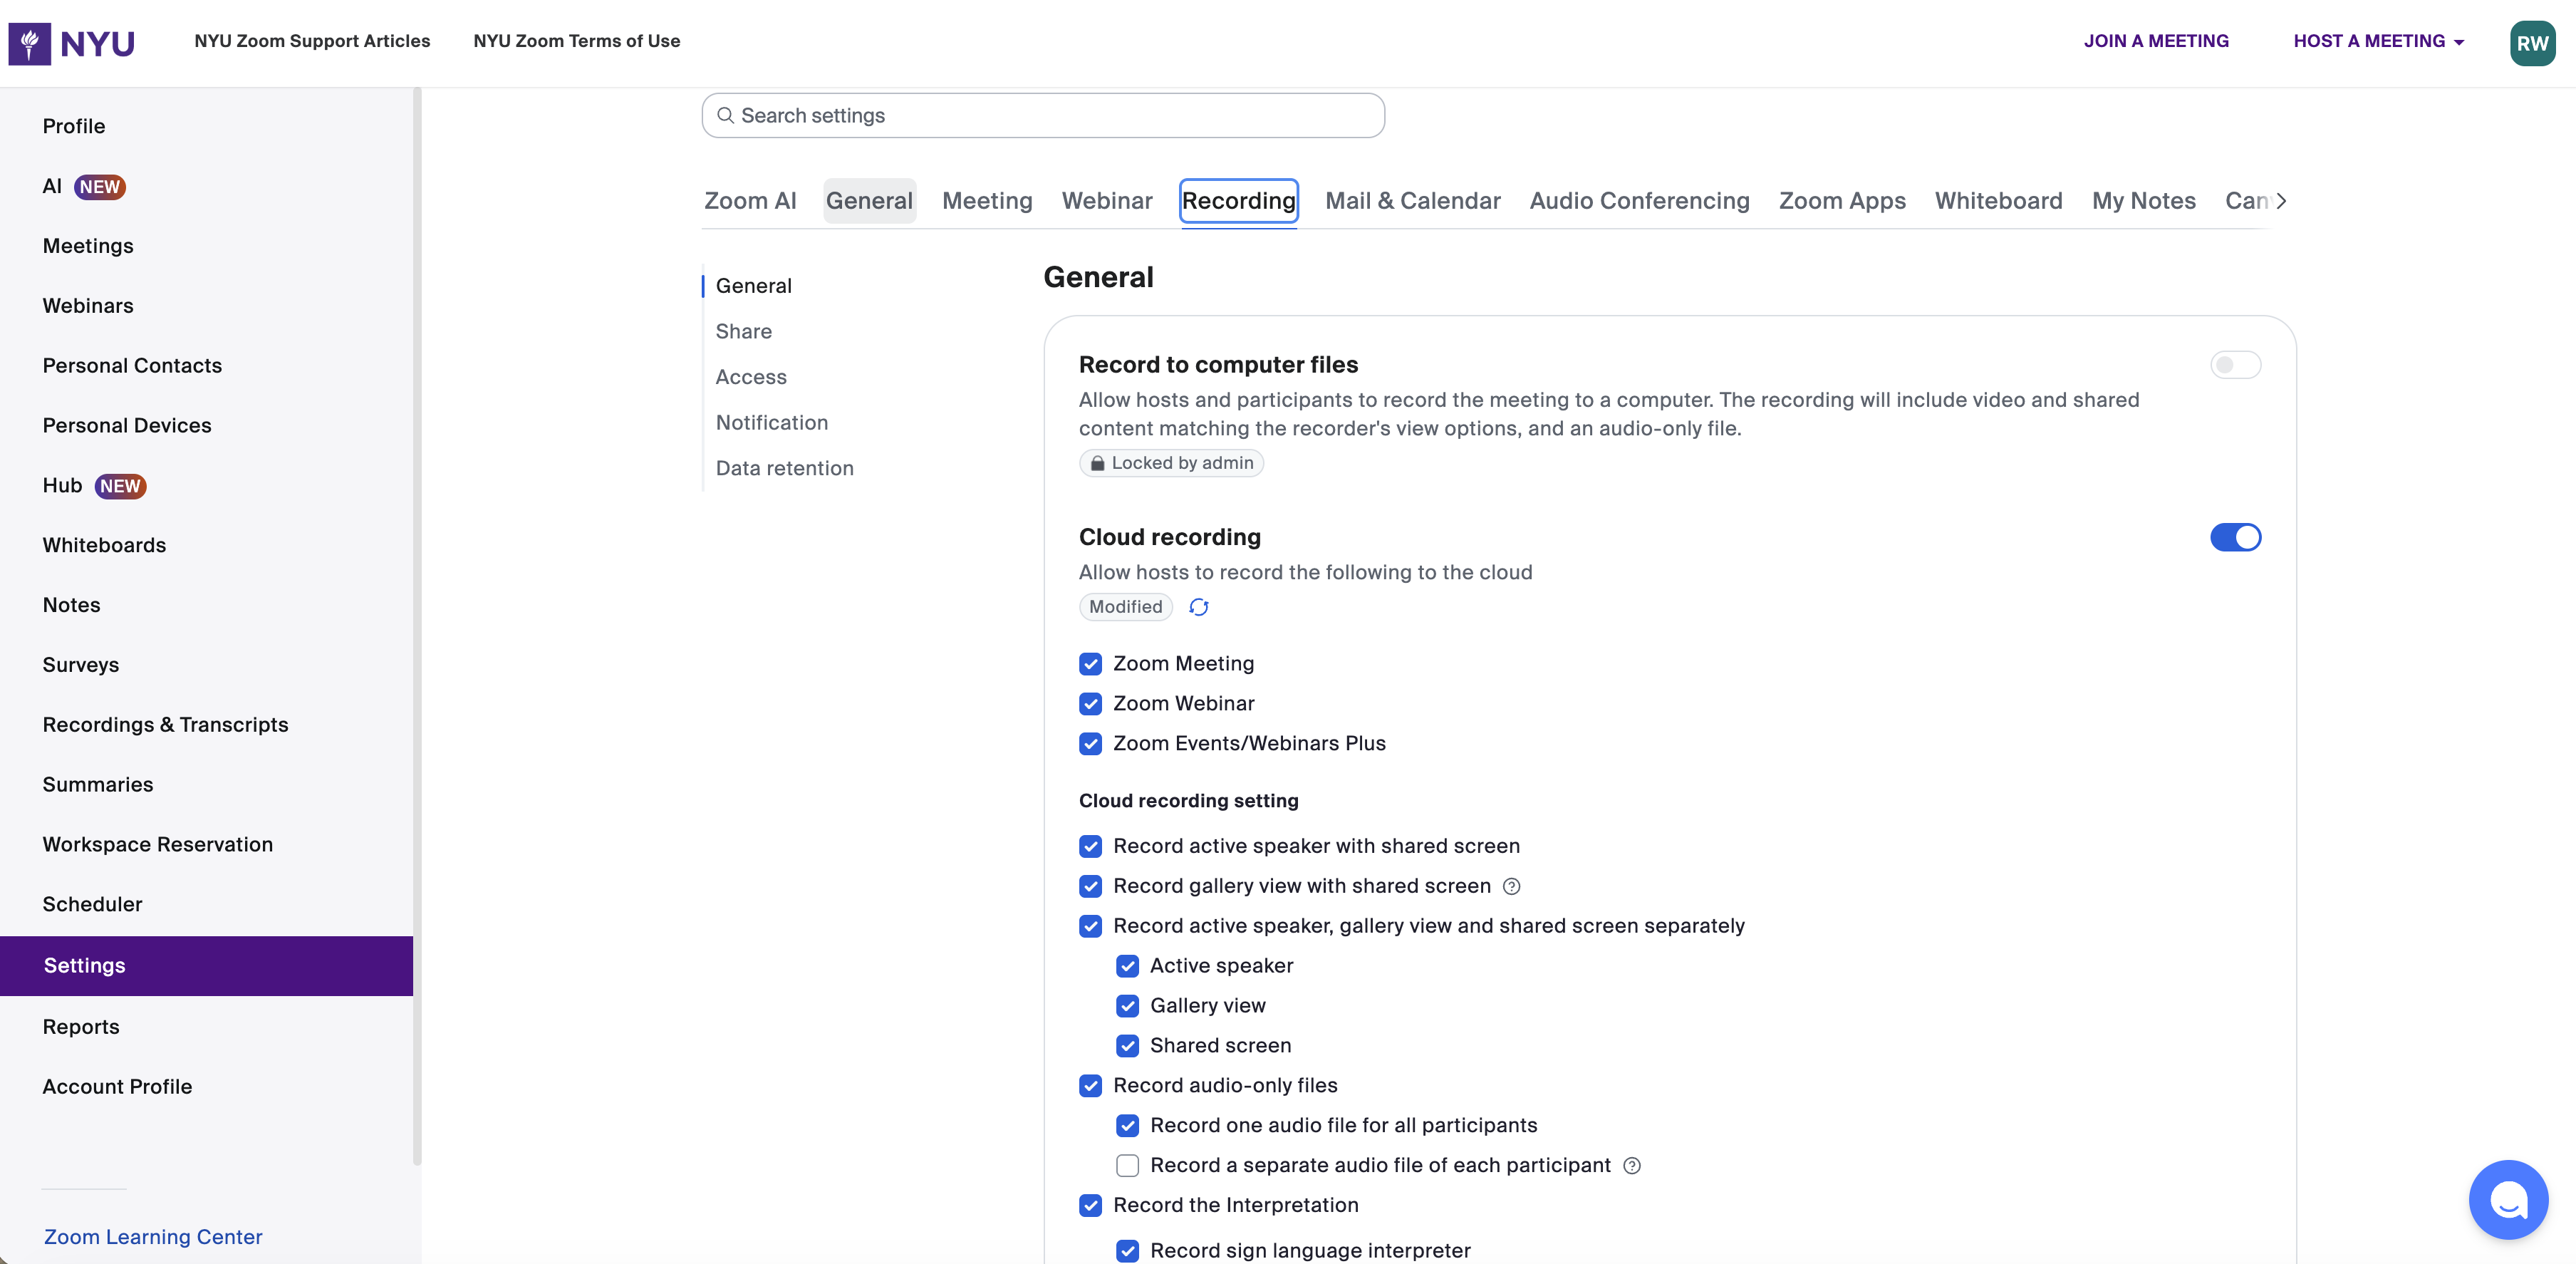
The only setting that is not checked in this screenshot is the “record a separate audio file of each participant”. If you have a video that involves more than one main voice talking, for example, if you are conducting an interview, please turn this setting on.
Once this “video with more than one main voice” has finished recording, please remember to turn off this setting for future recordings until the next time this setting is needed.
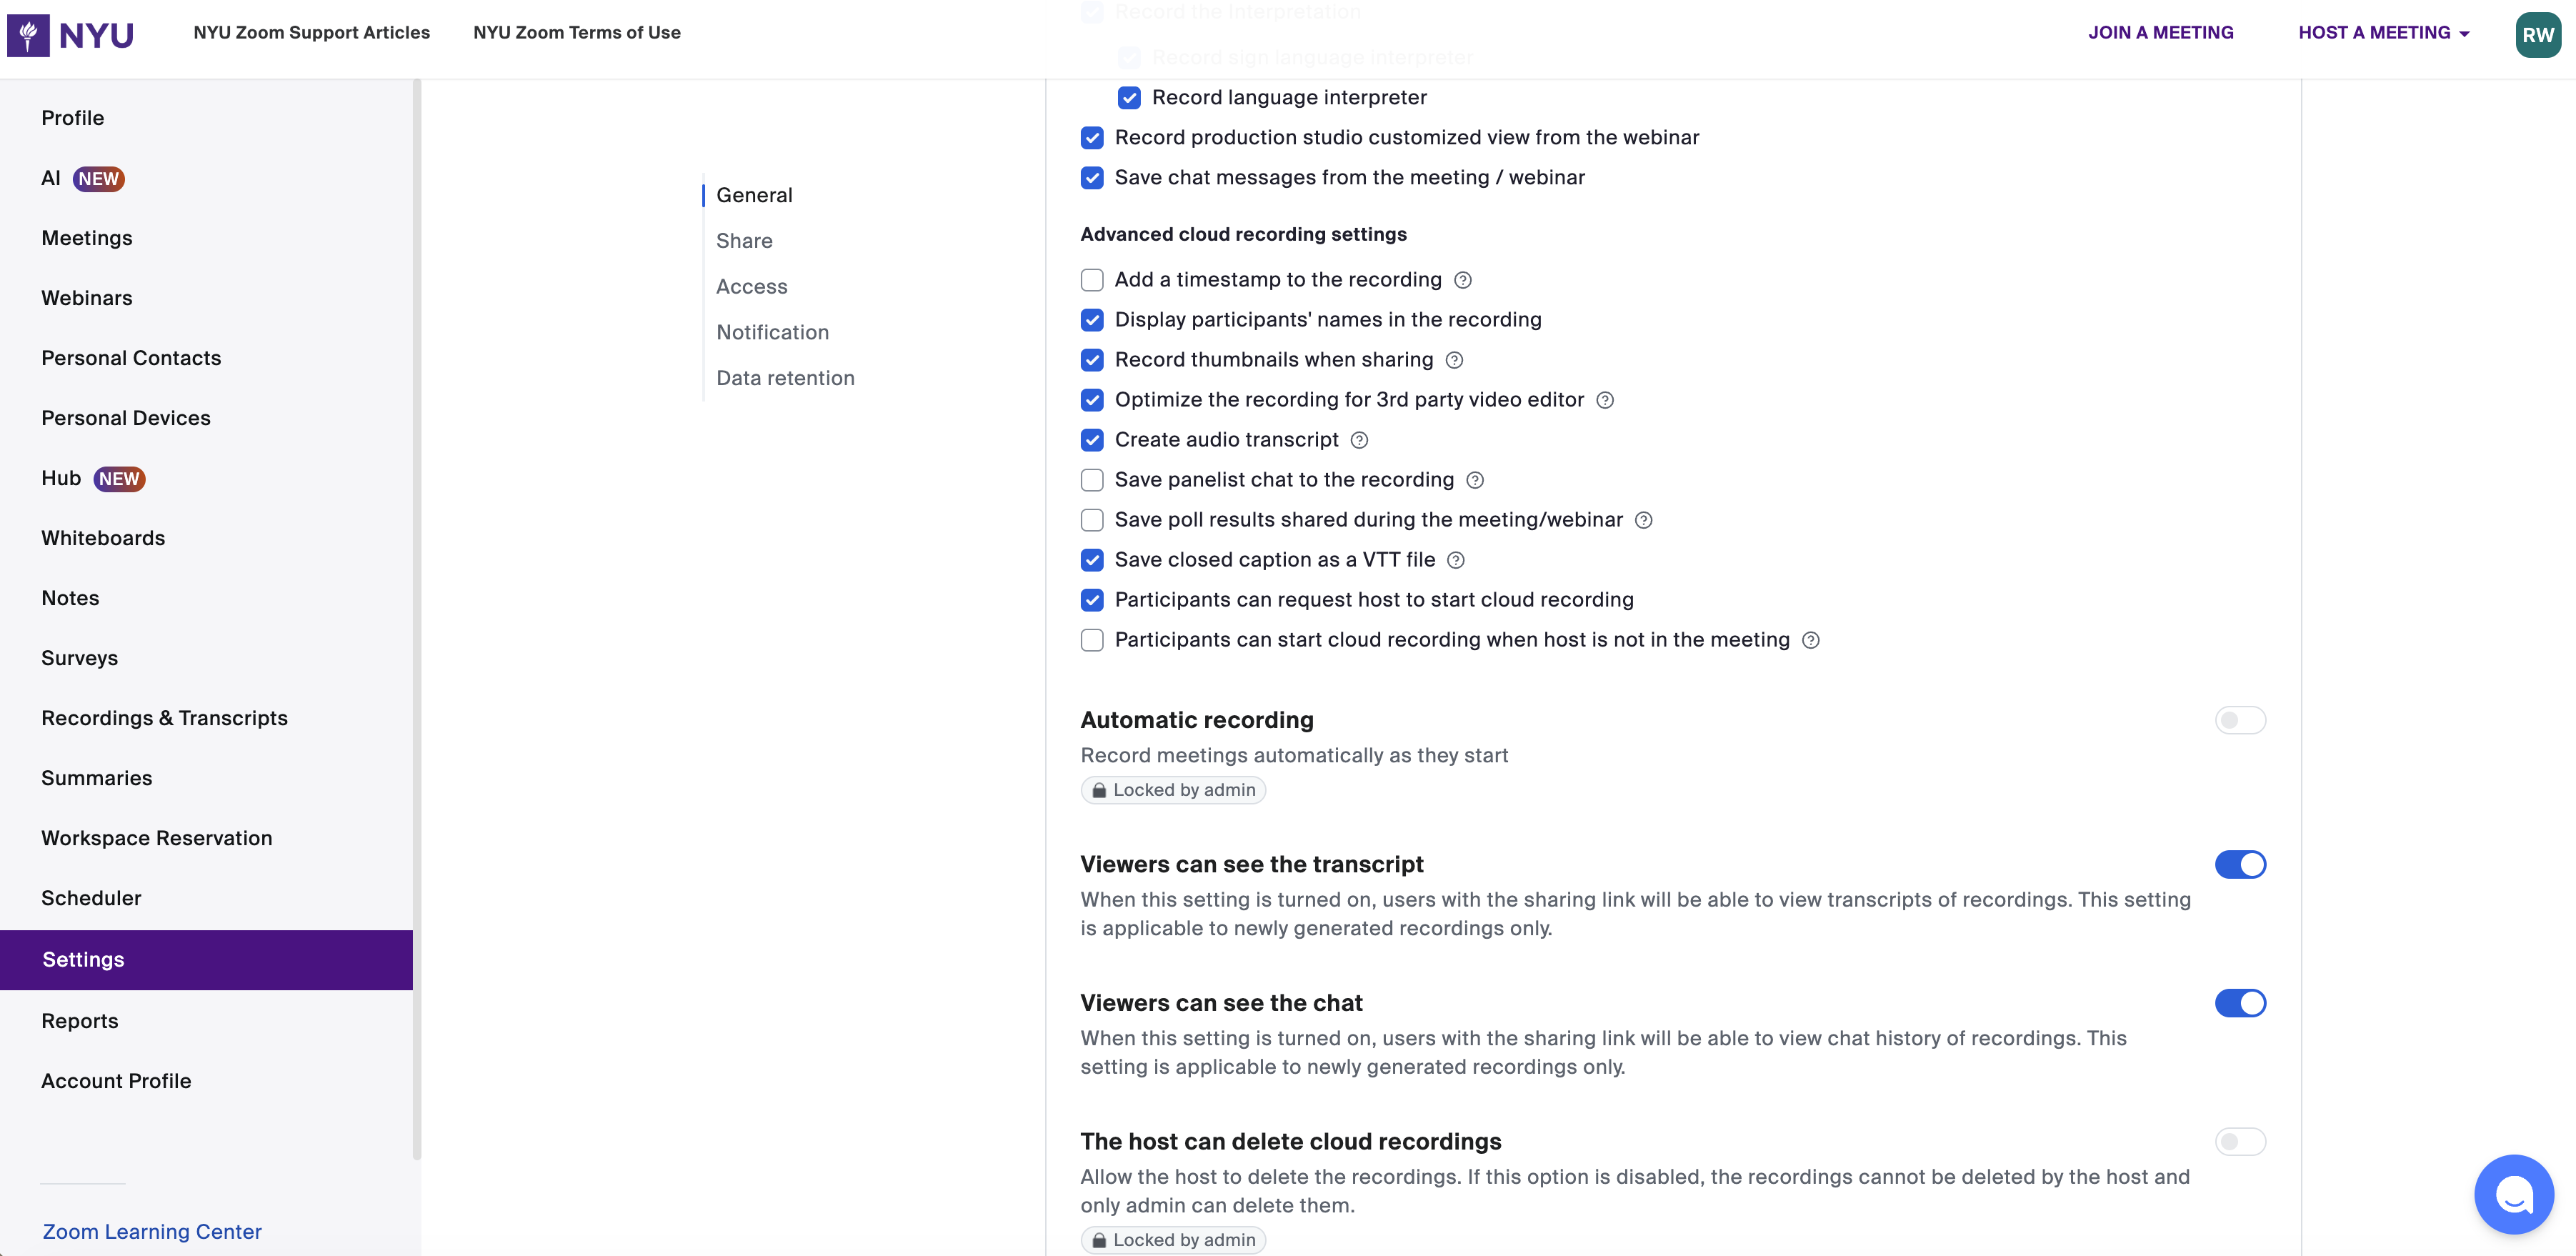
When you are ready to share your recording, access your videos by clicking on Recordings & Transcripts from the left navigation menu.
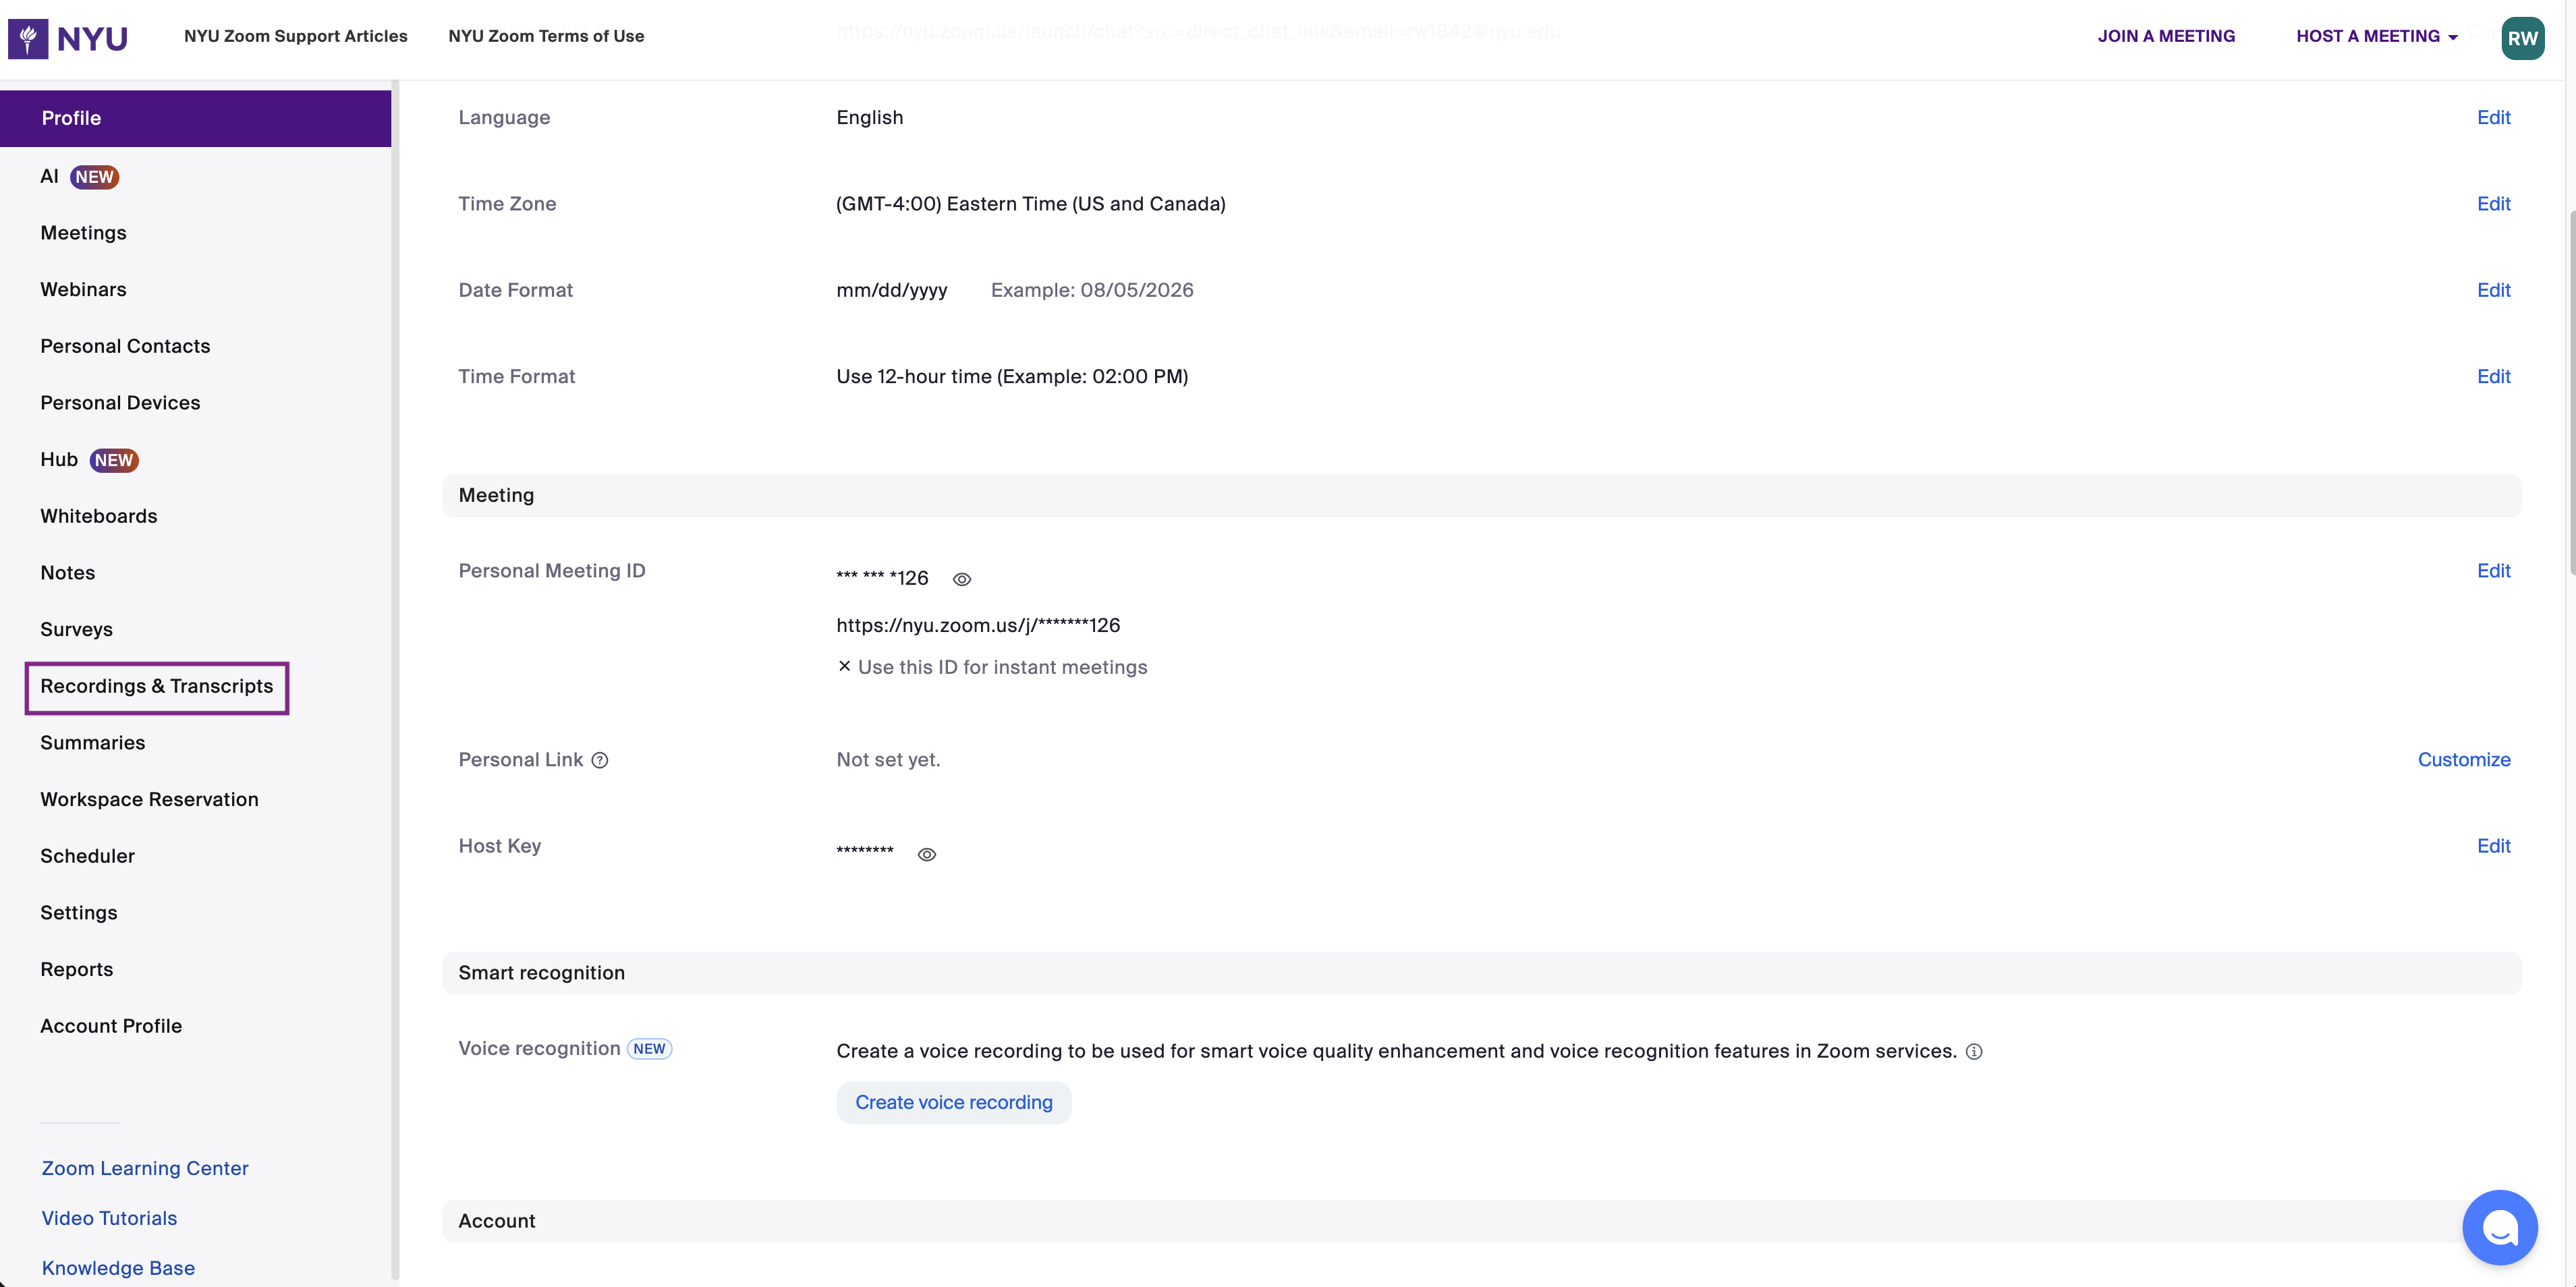
NOTE: Please do the following steps each time for each video you want to share.
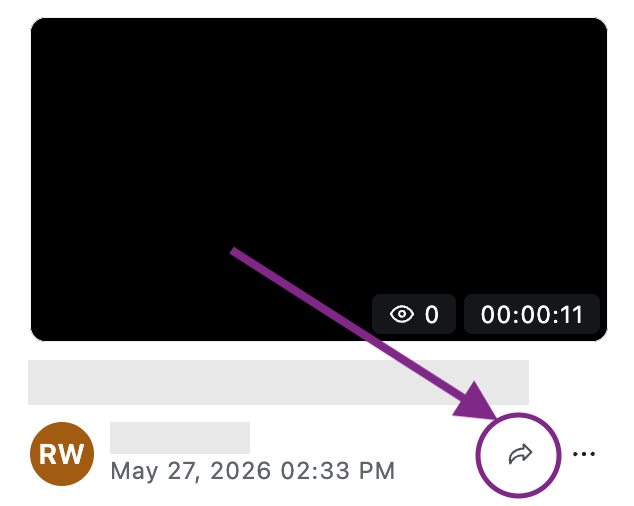
After you have reached the Recordings & Transcripts page, you will see a grid or list of all your recordings. Each recording has its own share button at the bottom of the video (purple circle). Click on this share button.
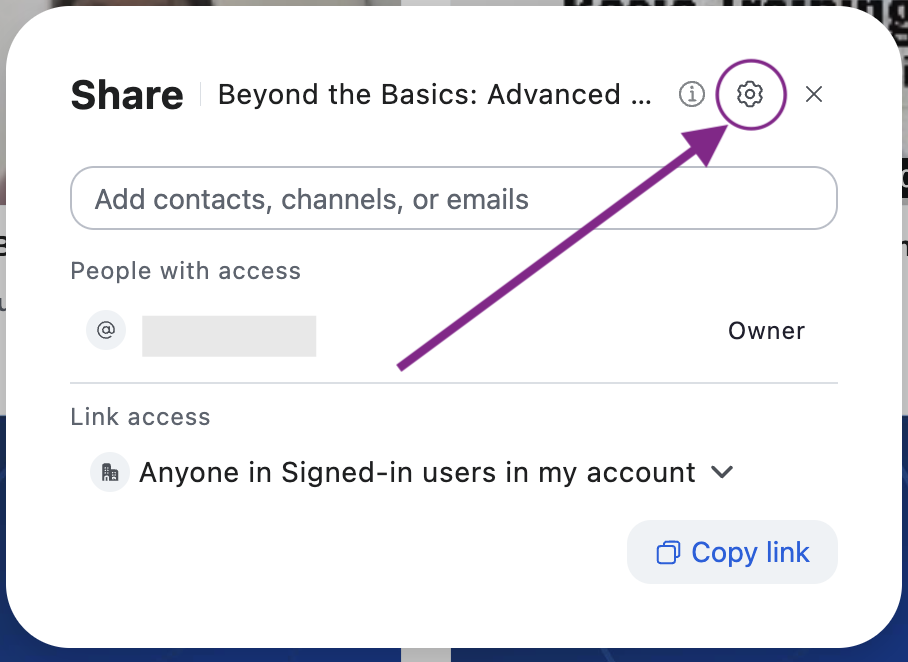
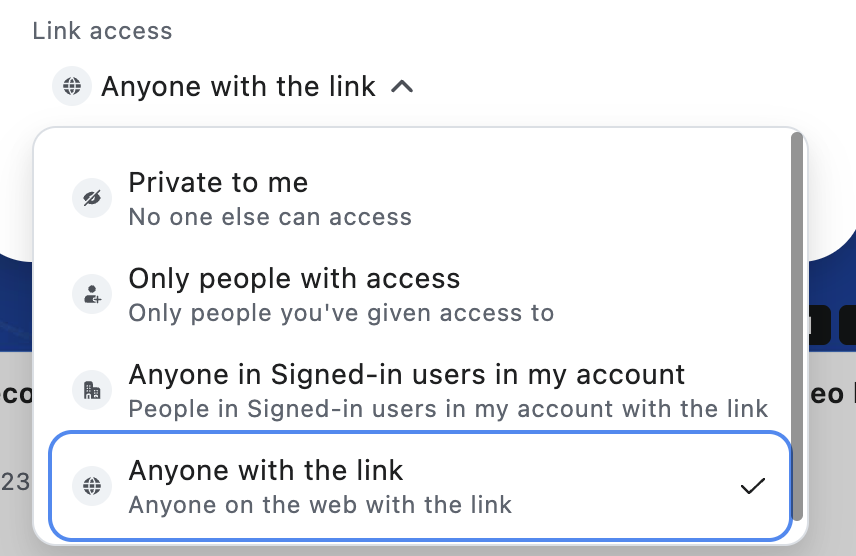
The following box will appear after you click the share button. Here you will be able to copy the link of your recording and share it with the TEE team. Or you can also choose to add tee-gph@nyu.edu in the text field. Please click on the link access drop down menu and choose the “Anyone with the link”.
Next, click on the gear icon to open “More Settings”. Please select Viewers can download and Viewers can see transcript. Make sure to save your settings with the “Save” button.
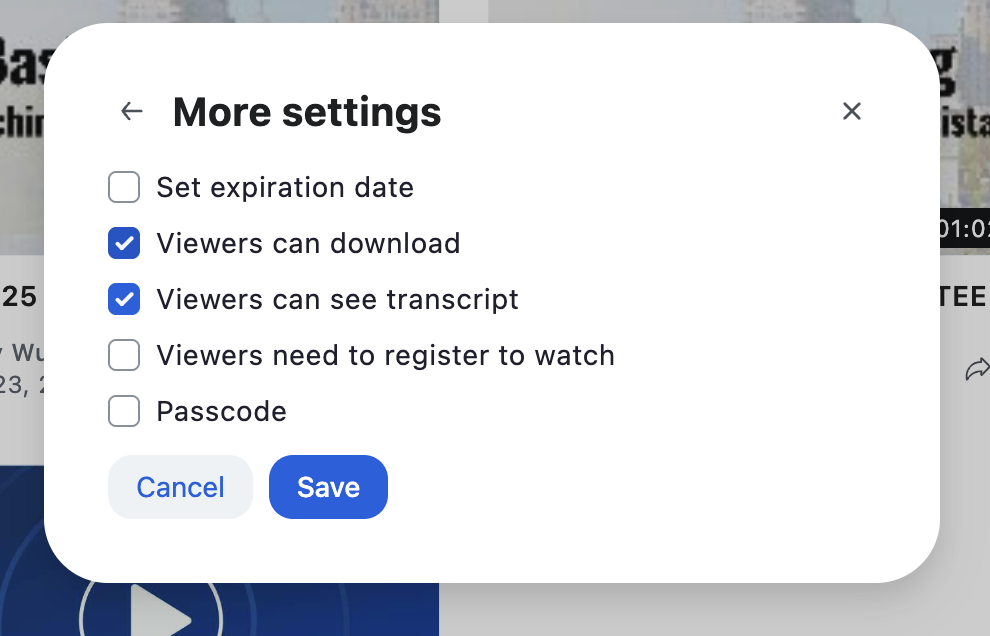
After you have saved these settings, close the box. Complete this post-production form and share the copied video link in that form.