Use the Discussions tools to interact with the class by setting up forums and topics.
General
Create a forum by clicking on New Forum under the dropdown menu.
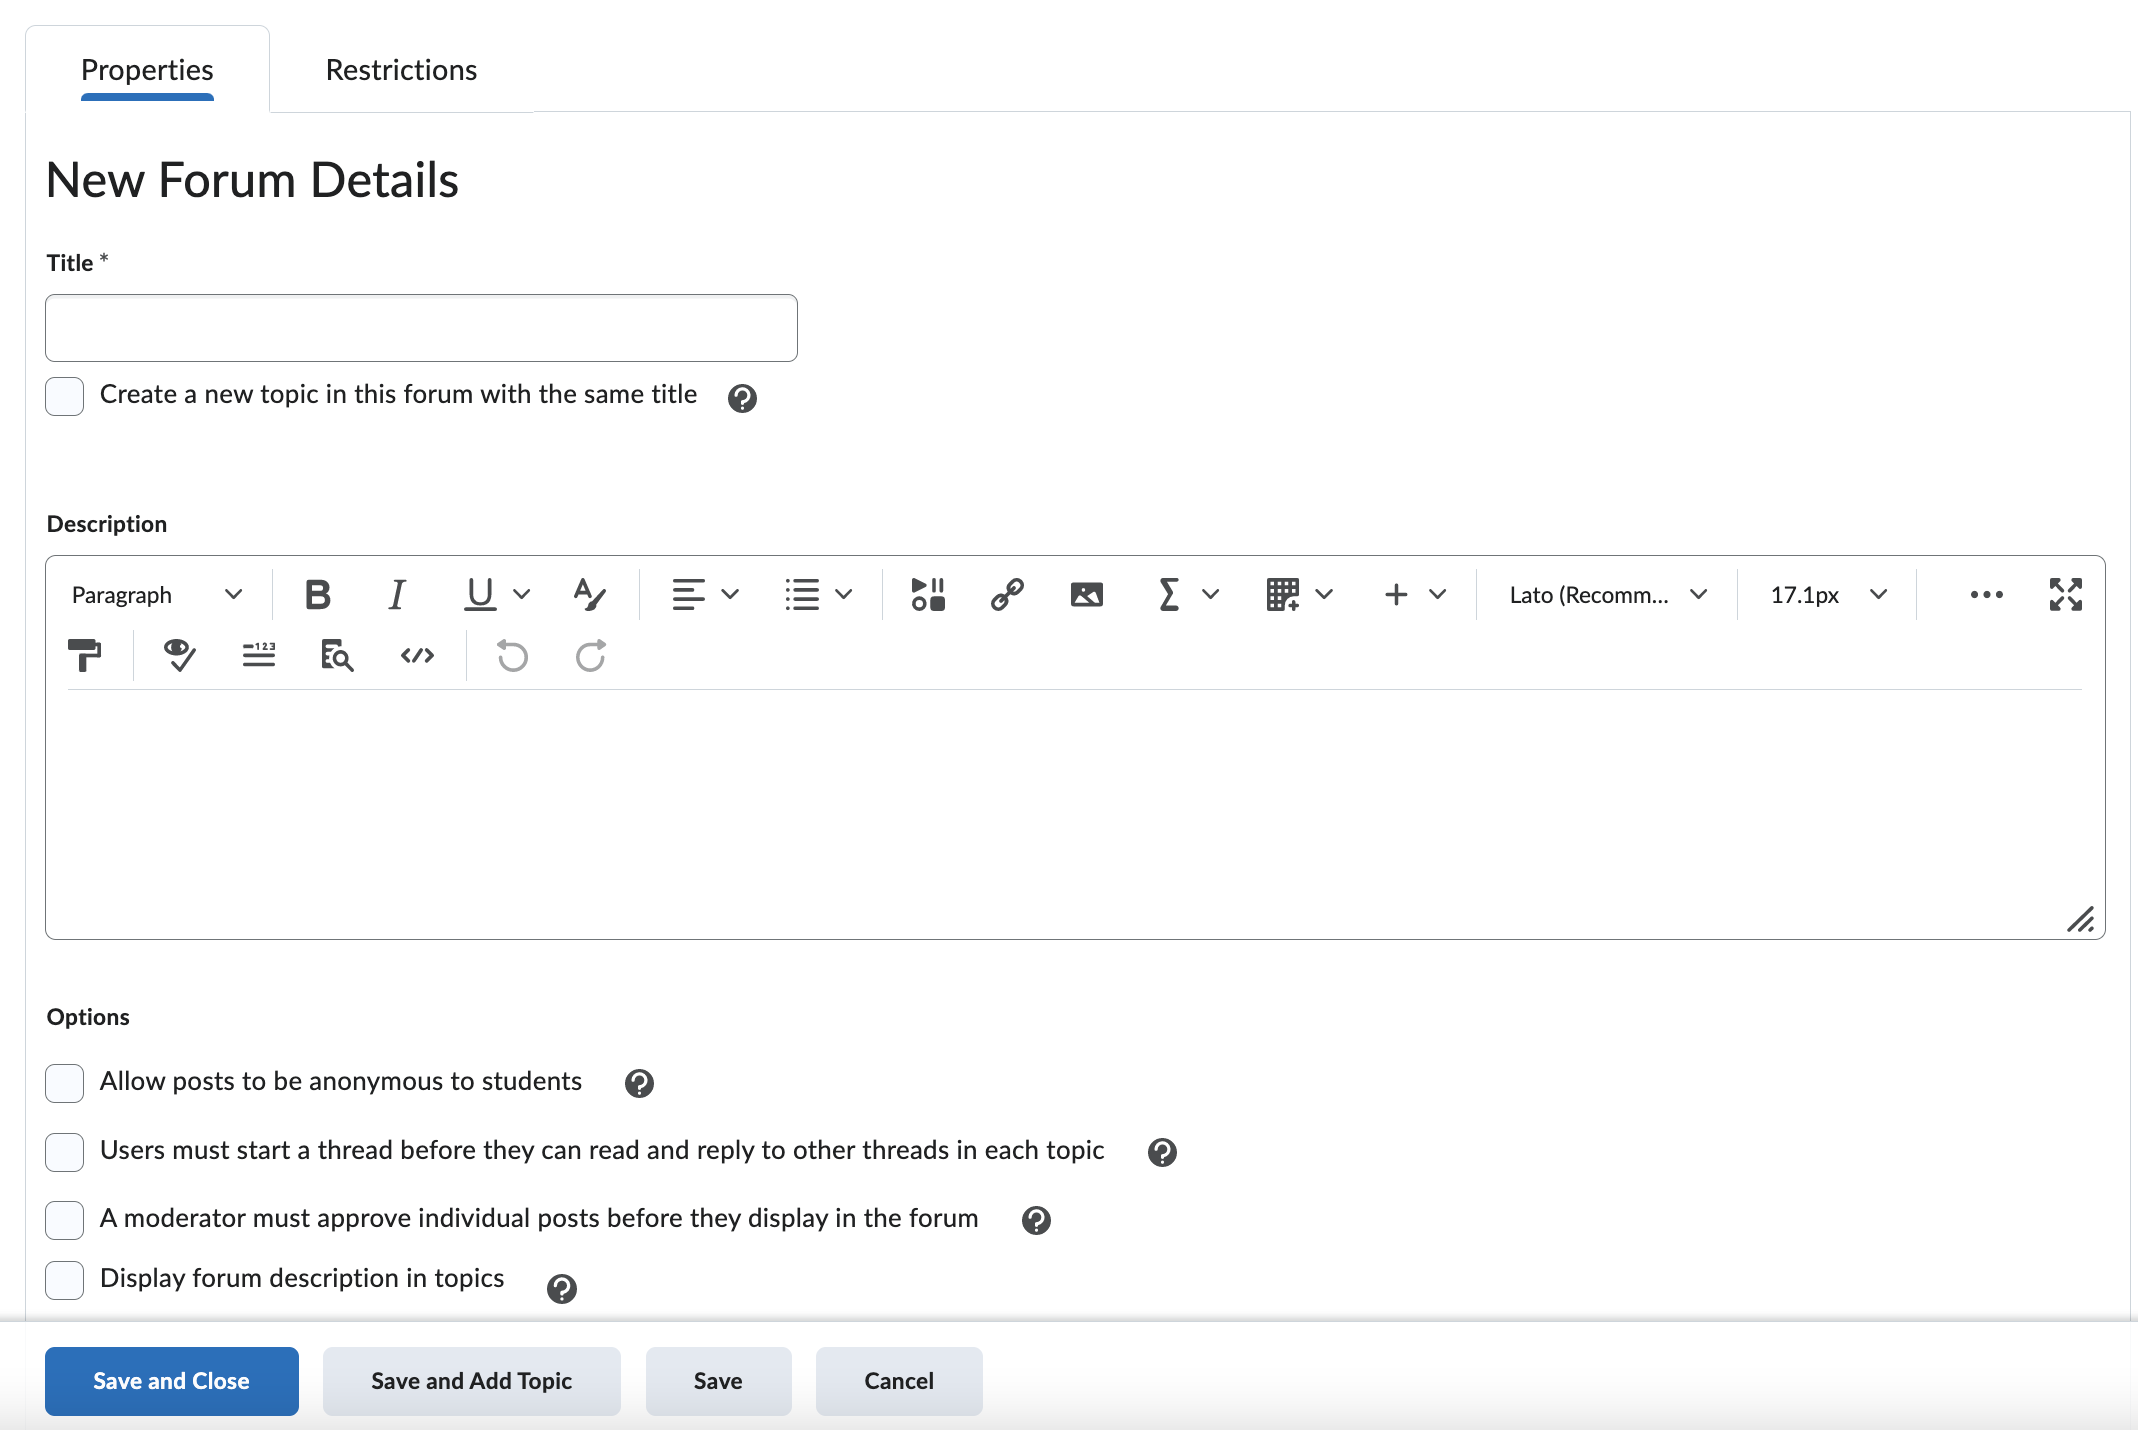
Next, you’ll come to the following screen asking you to fill out details on this forum. Notice the options that you have. Click on the question mark icon for more information on each option.
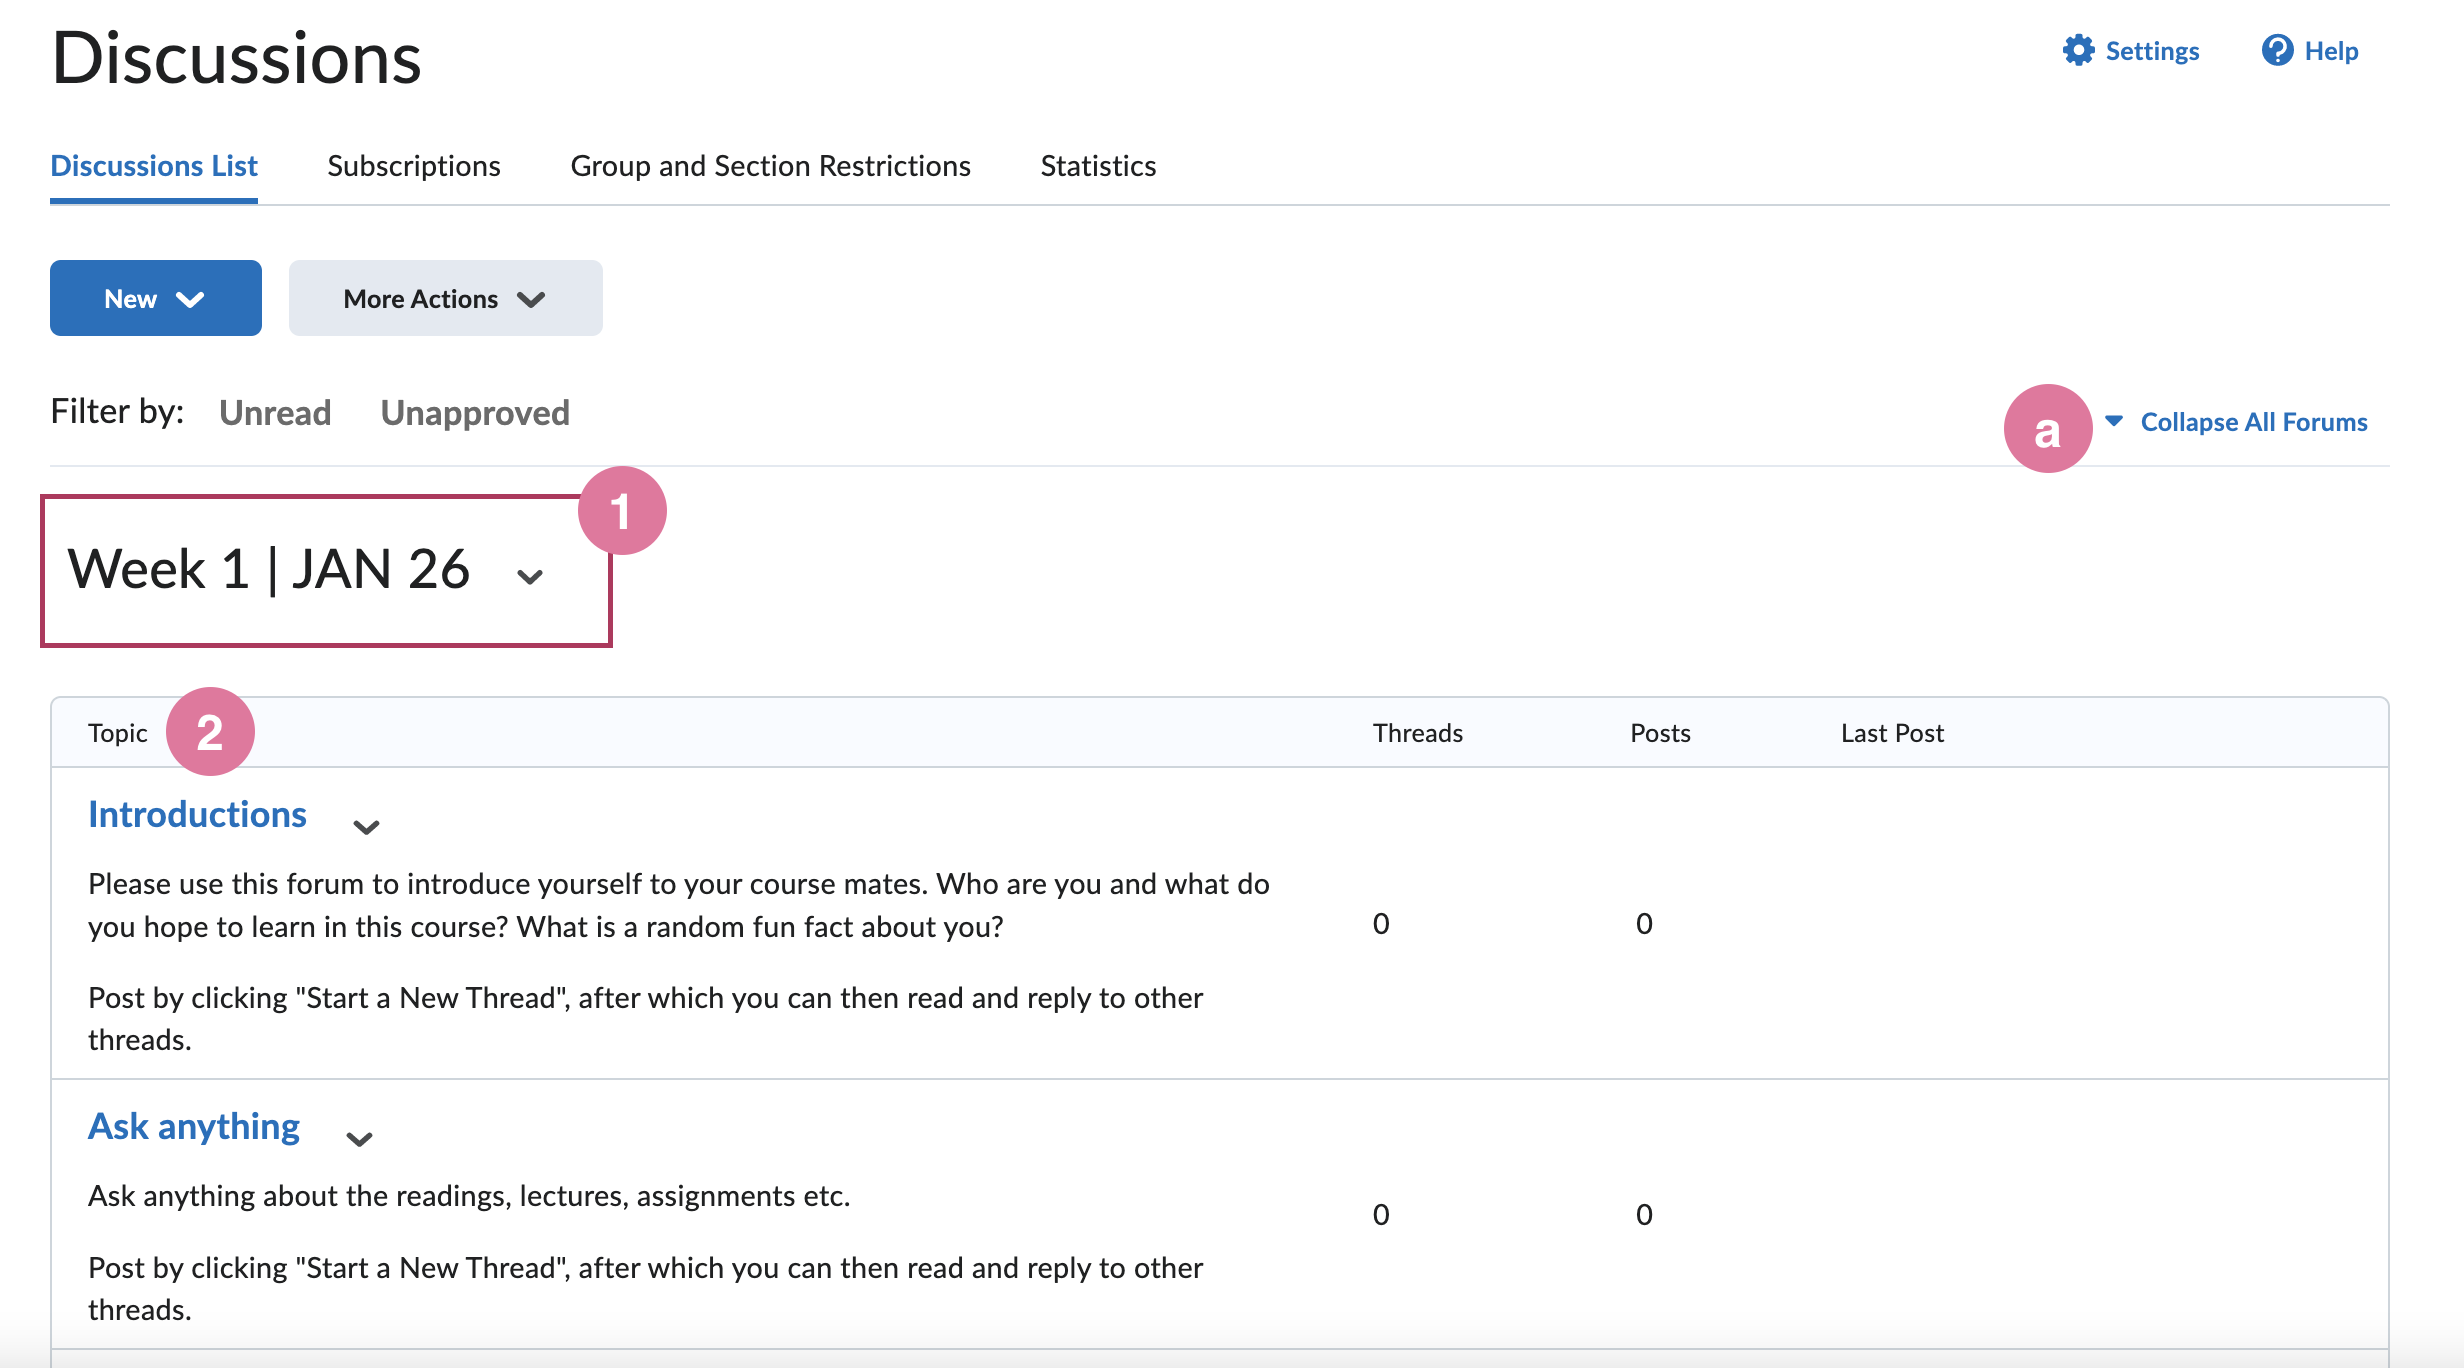
In Brightspaces, “forums” refer to a category or a group of topics clustered together. You can think of a forum as a unit, and a topic as an issue of discussion. Notice the difference between forums and topics from the screenshot below. (1) The heading Week 1 is a forum and there are two topics (2) nested in this forum, “Introductions” and “Ask anything”. Click on the topic to be directed to that discussion area and join in the conversation by starting or replying to threads. If you decide to add a forum description, you’ll see the description underneath the forum name, and above the topics. In this example below, no forum description is provided. Use the Collapse All Forums (a) function to see an overview of all the forums.
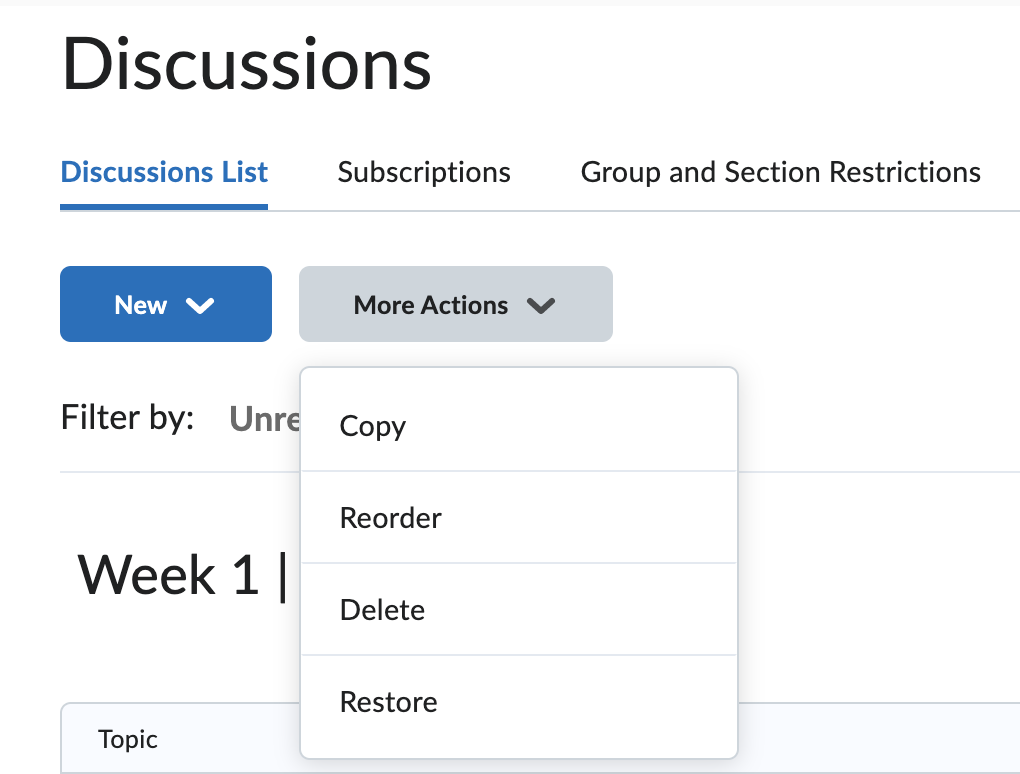
Click on More Actions dropdown menu for more action items. You can duplicate a forum, reorder the order of forums and topics, delete forums and topics, or restore previously deleted forums and topics.
Group Discussions
When creating a new topic, settings for topics in discussion forums can be set so that the students can only see the posts of the group they are in. Make sure that before creating grouped discussions, you have already set up groups in the “Groups” tool.
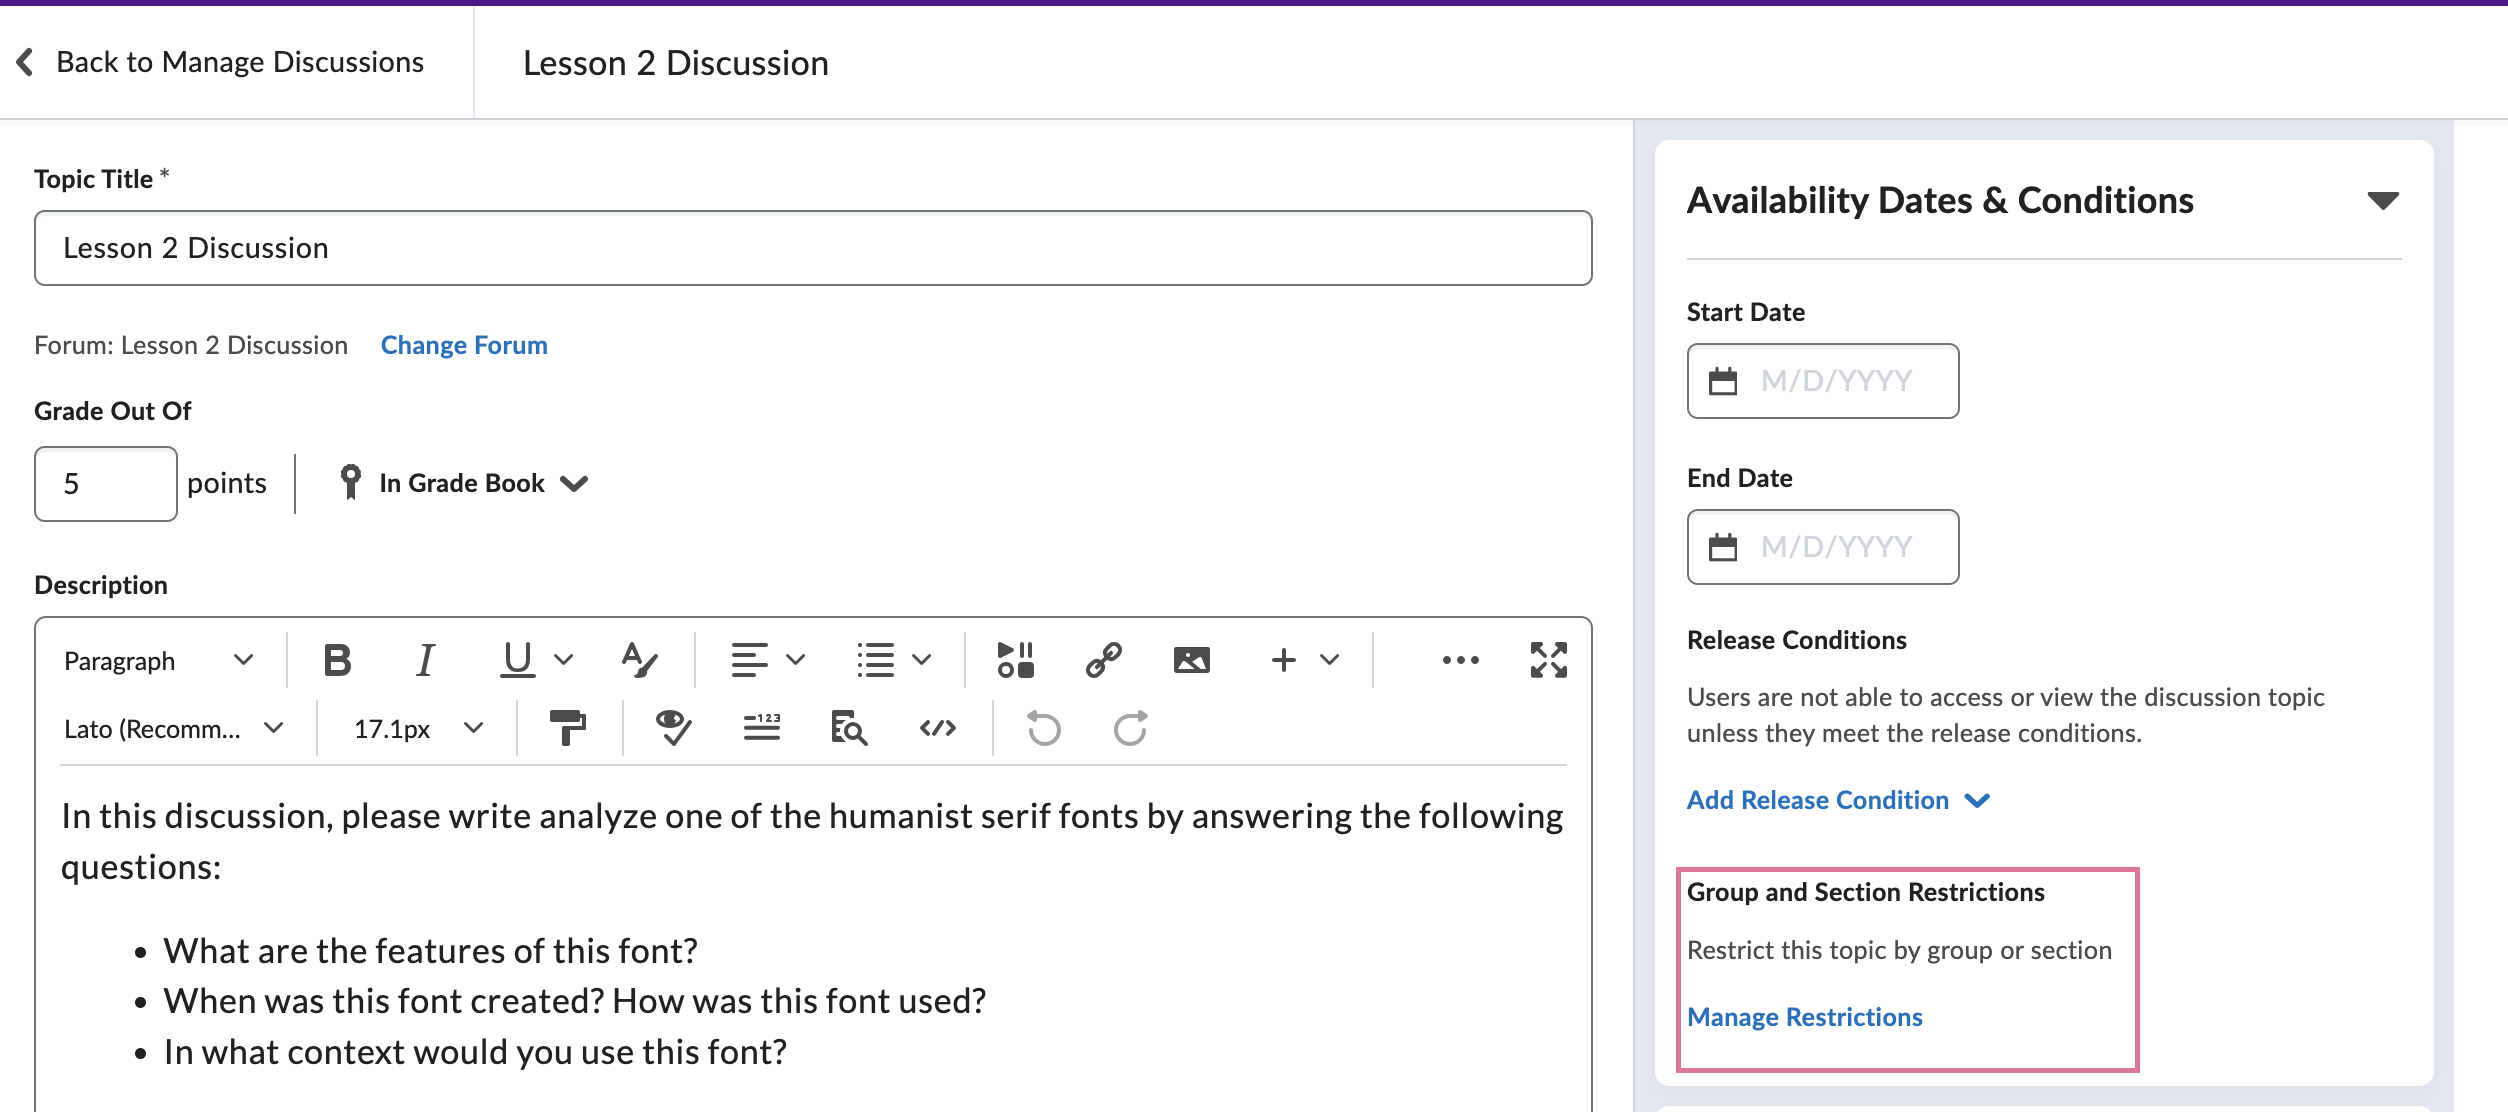
Click on the menu “Availability Dates & Conditions” on the right to expand. Next, find the section “Group and Section Restrictions” and click on the button “Manage Restrictions”.
Select the second option “Restrict topic and separate the threads” in order to restrict users from seeing posts from other groups. They will only see the posts made in their own group/section. Next, select the appropriate group category from the menu that appears below.
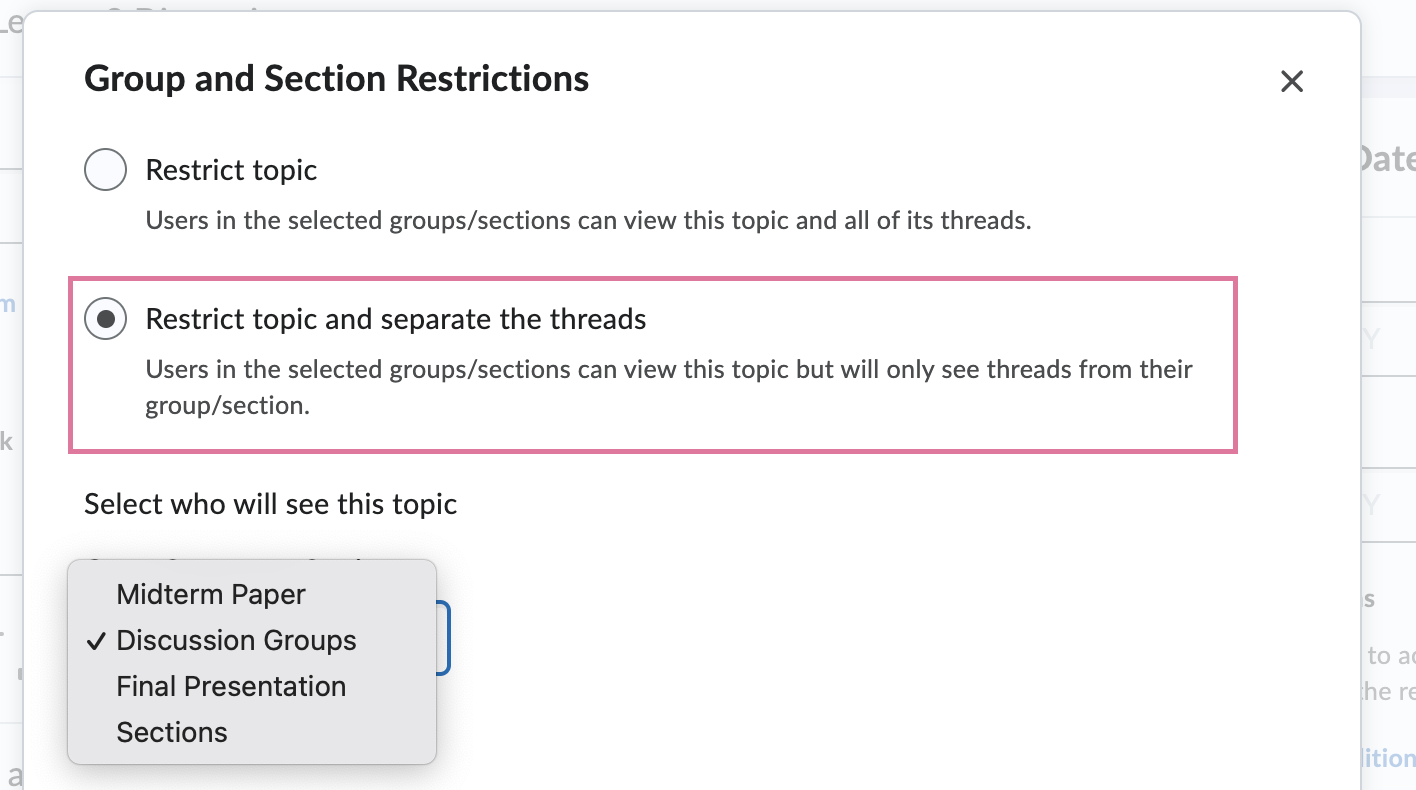
Note: You cannot change these restriction settings after posts have been received.
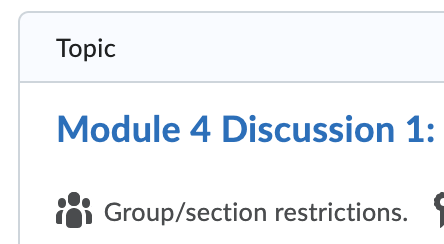
After designating a topic as a group topic, an icon will appear under the title of the topic signifying that this particular topic now has group restrictions.
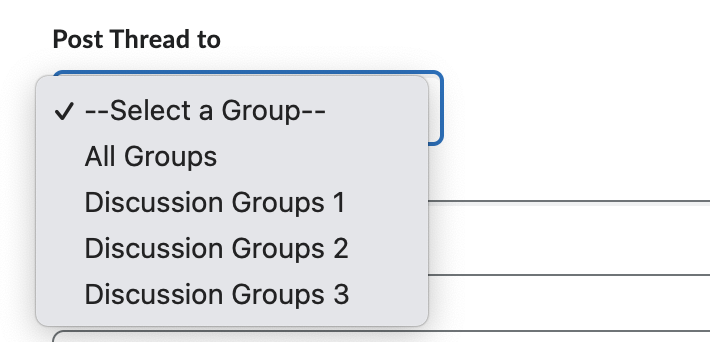
When you’re in a group topic, click on the “Start a New Thread” button to create a new discussion thread. Since this is a group topic, you’ll be able to select the group you want to post a thread to. If you select “All Groups”, then all groups will receive a copy of this thread. In this example below, if you select “All Groups”, then the thread will automatically be posted to Discussion Groups 1, Discussion Groups 2, and Discussion Groups 3.
This is an example of how the threads will look after you have posted the thread to all groups. Note: the threads will be shown in Z-A order of the group name.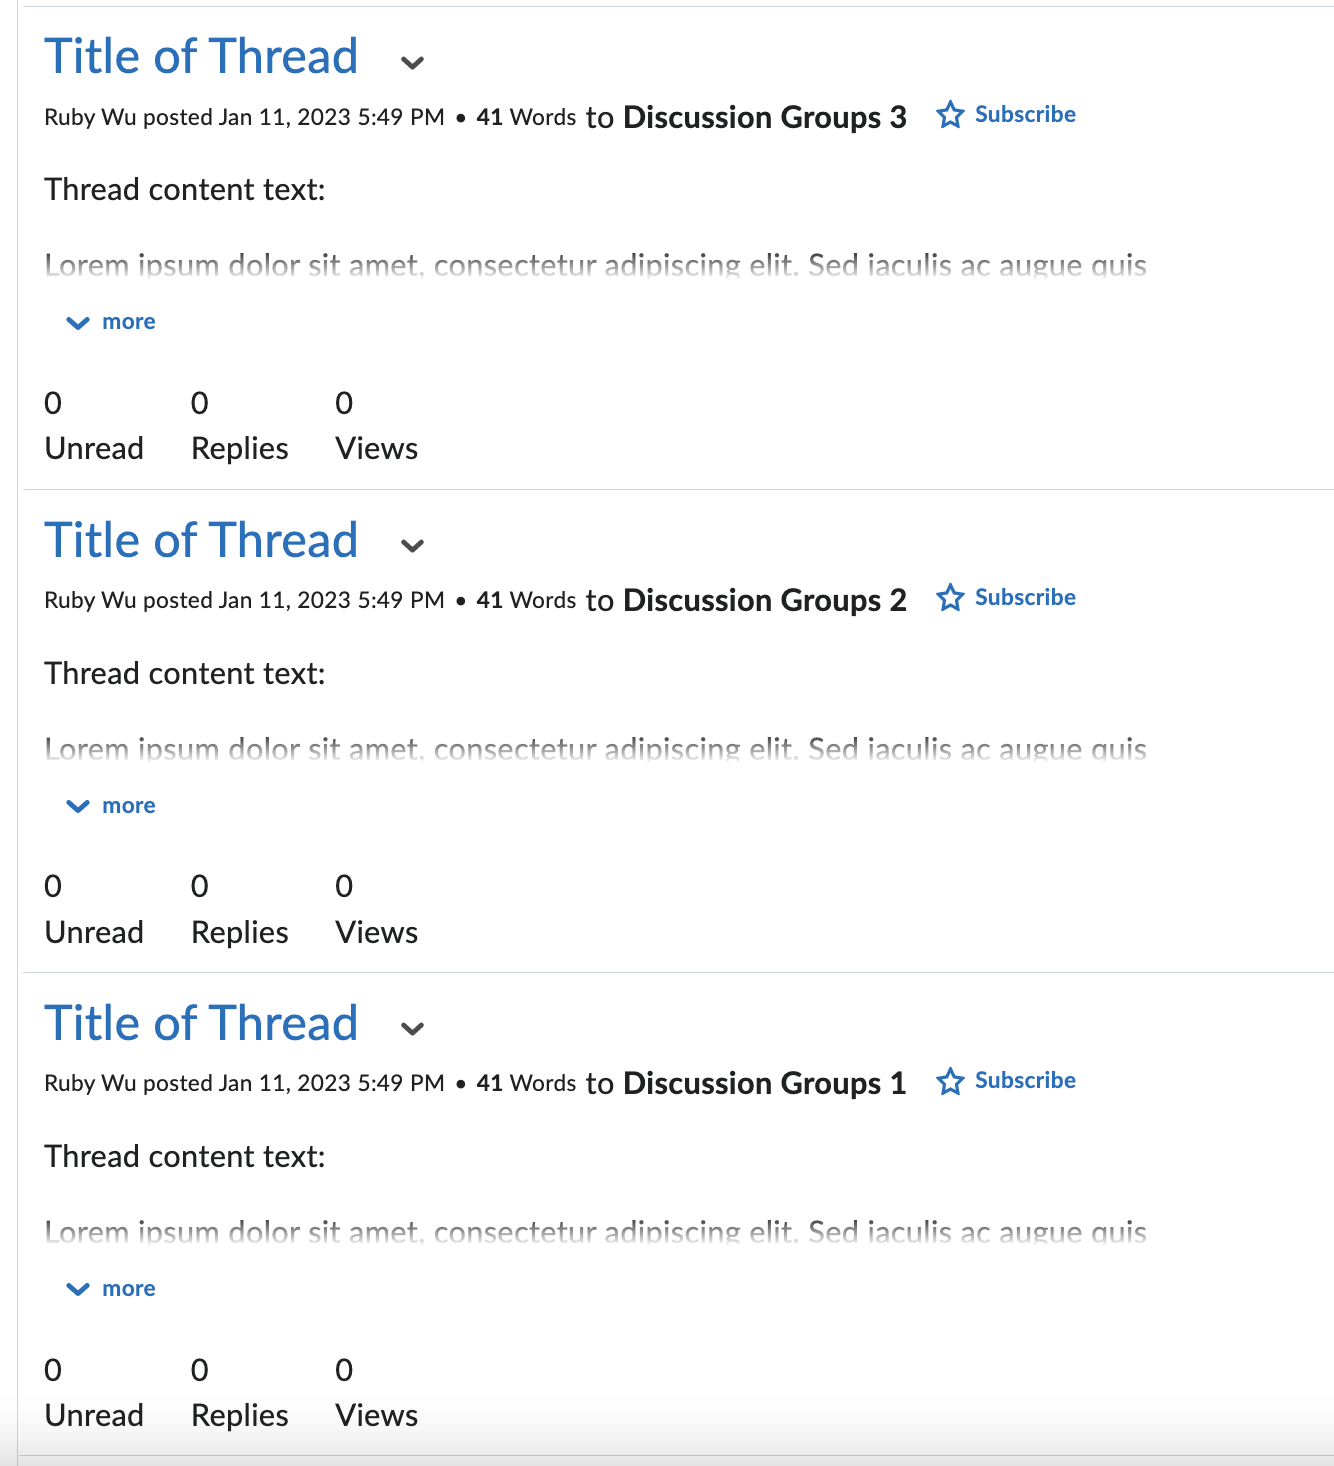
Assessing Discussions
Before you can begin assessing discussions, you must first set up the discussion. You can quickly identify a discussion that includes assessment by a badge icon with the words “Includes Assessment” underneath the title of a topic, as shown here.

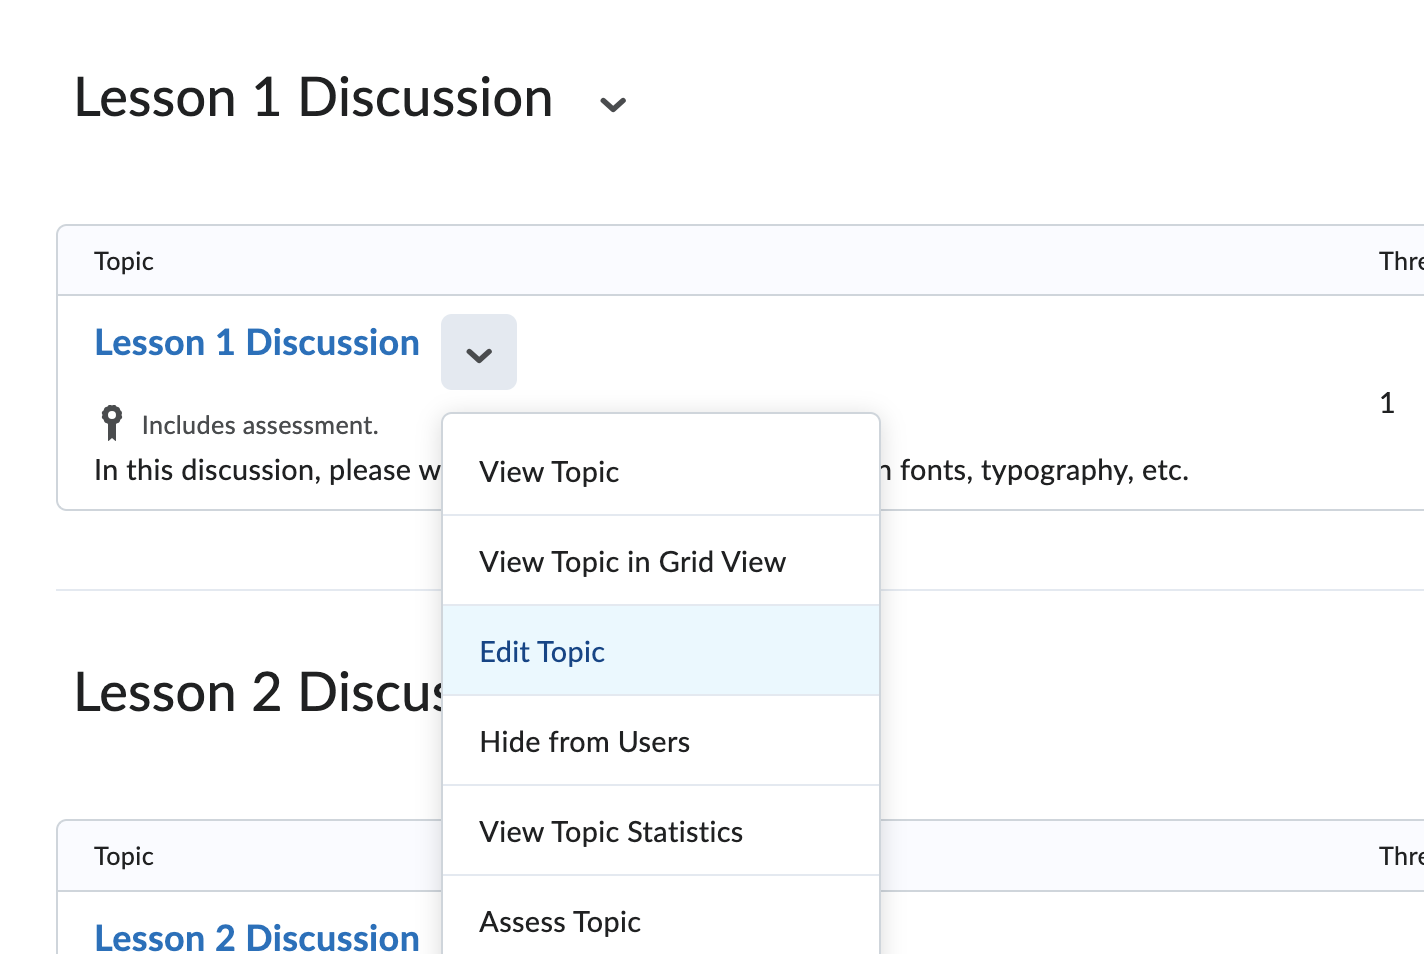
To add an assessment, click on the down arrow next to a topic. Next, click on “Edit Topic” from the menu that appears.
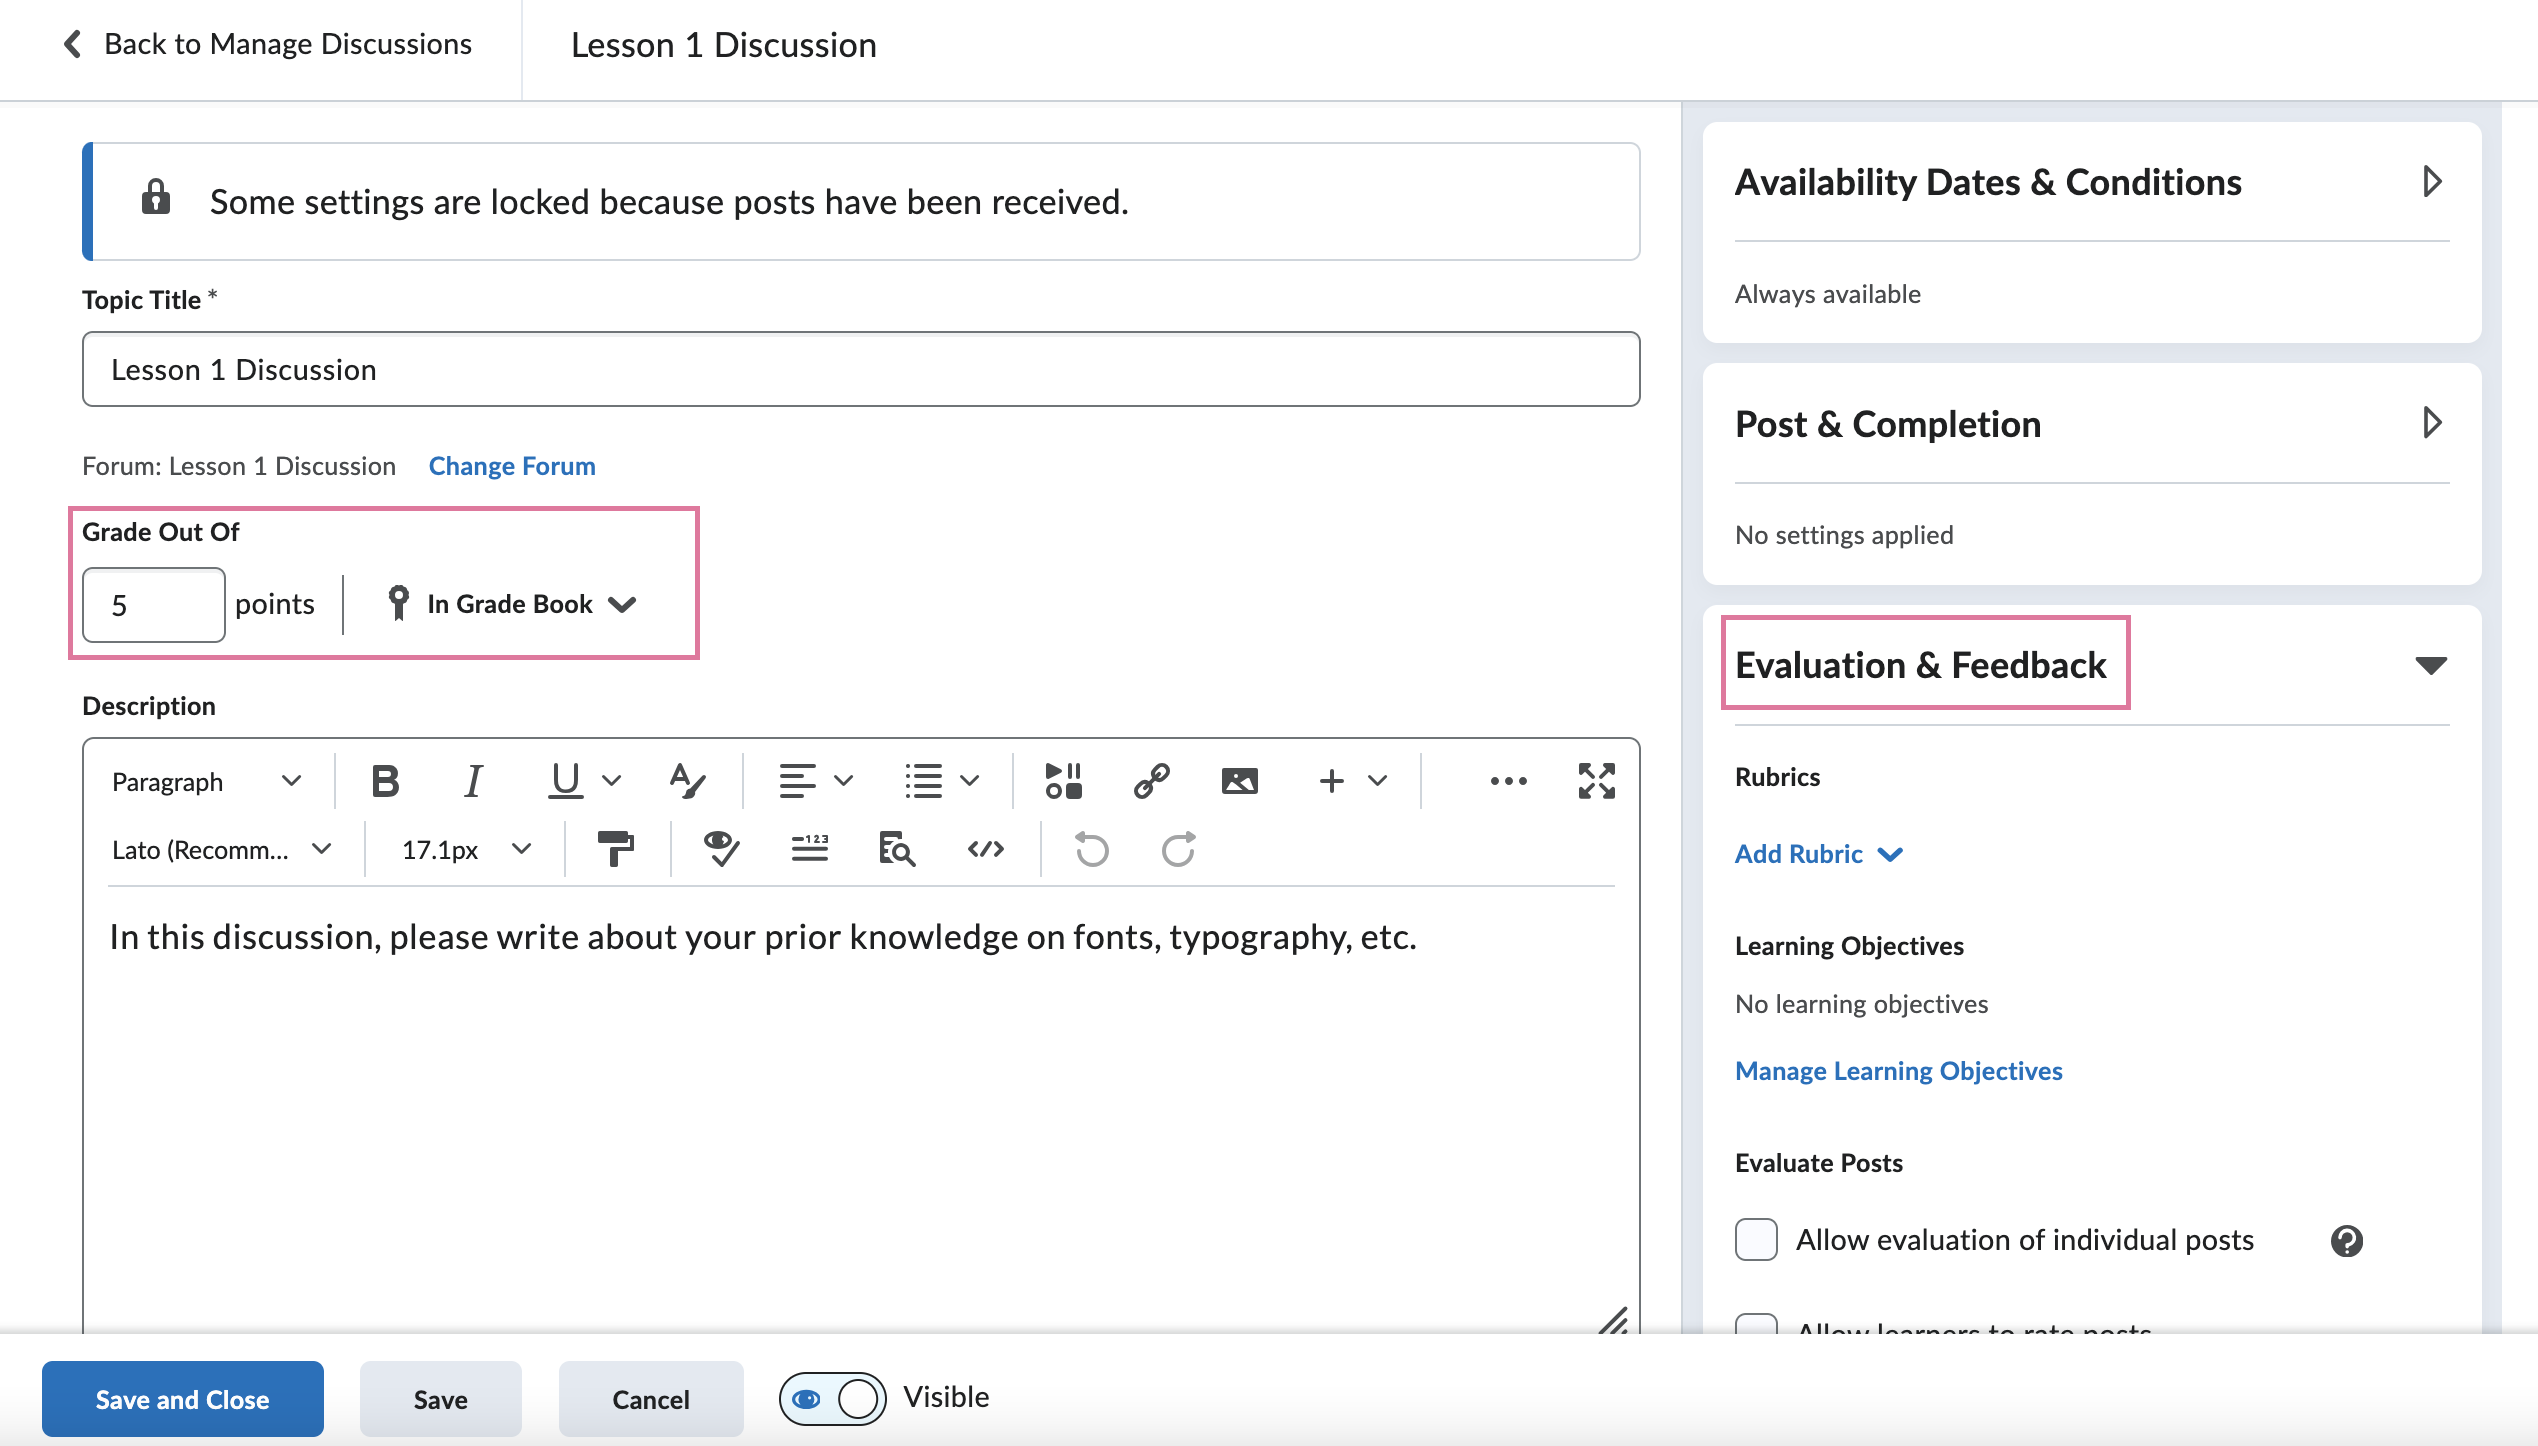
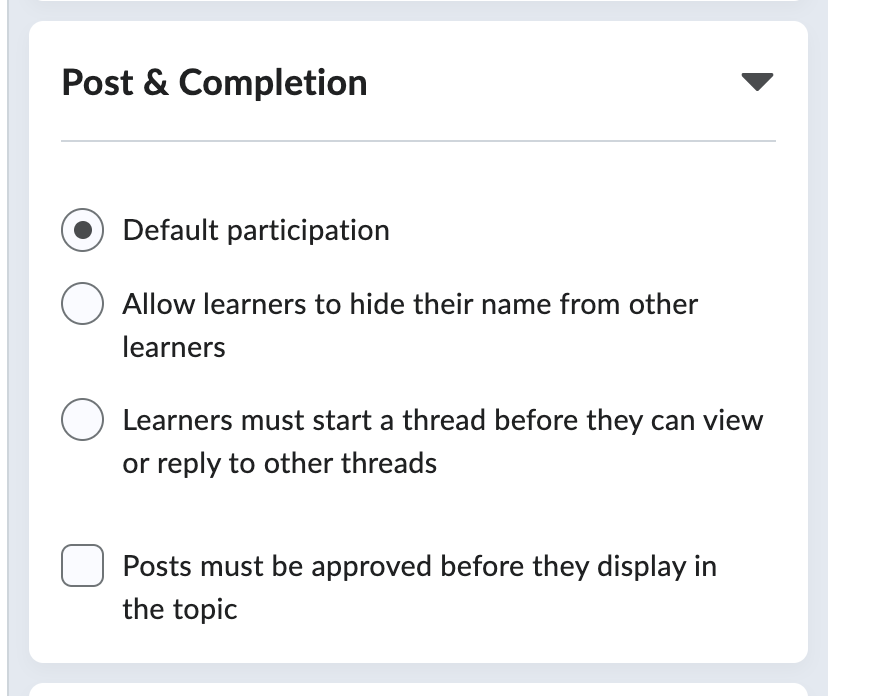
You’ll be able to assign this topic to a grade item in the gradebook, give the topic a score, and add a rubric to the topic from the “Evaluation & Feedback” menu. The option of assessment of individual posts is also provided. Additional options can be found under “Post & Completion”. Remember to click on “Save and Close” once you are finished.
Now that assessment settings have been set up, when it’s time to assess the students, click on the down arrow next to the topic title. Next, click on “Assess Topic” in the menu.
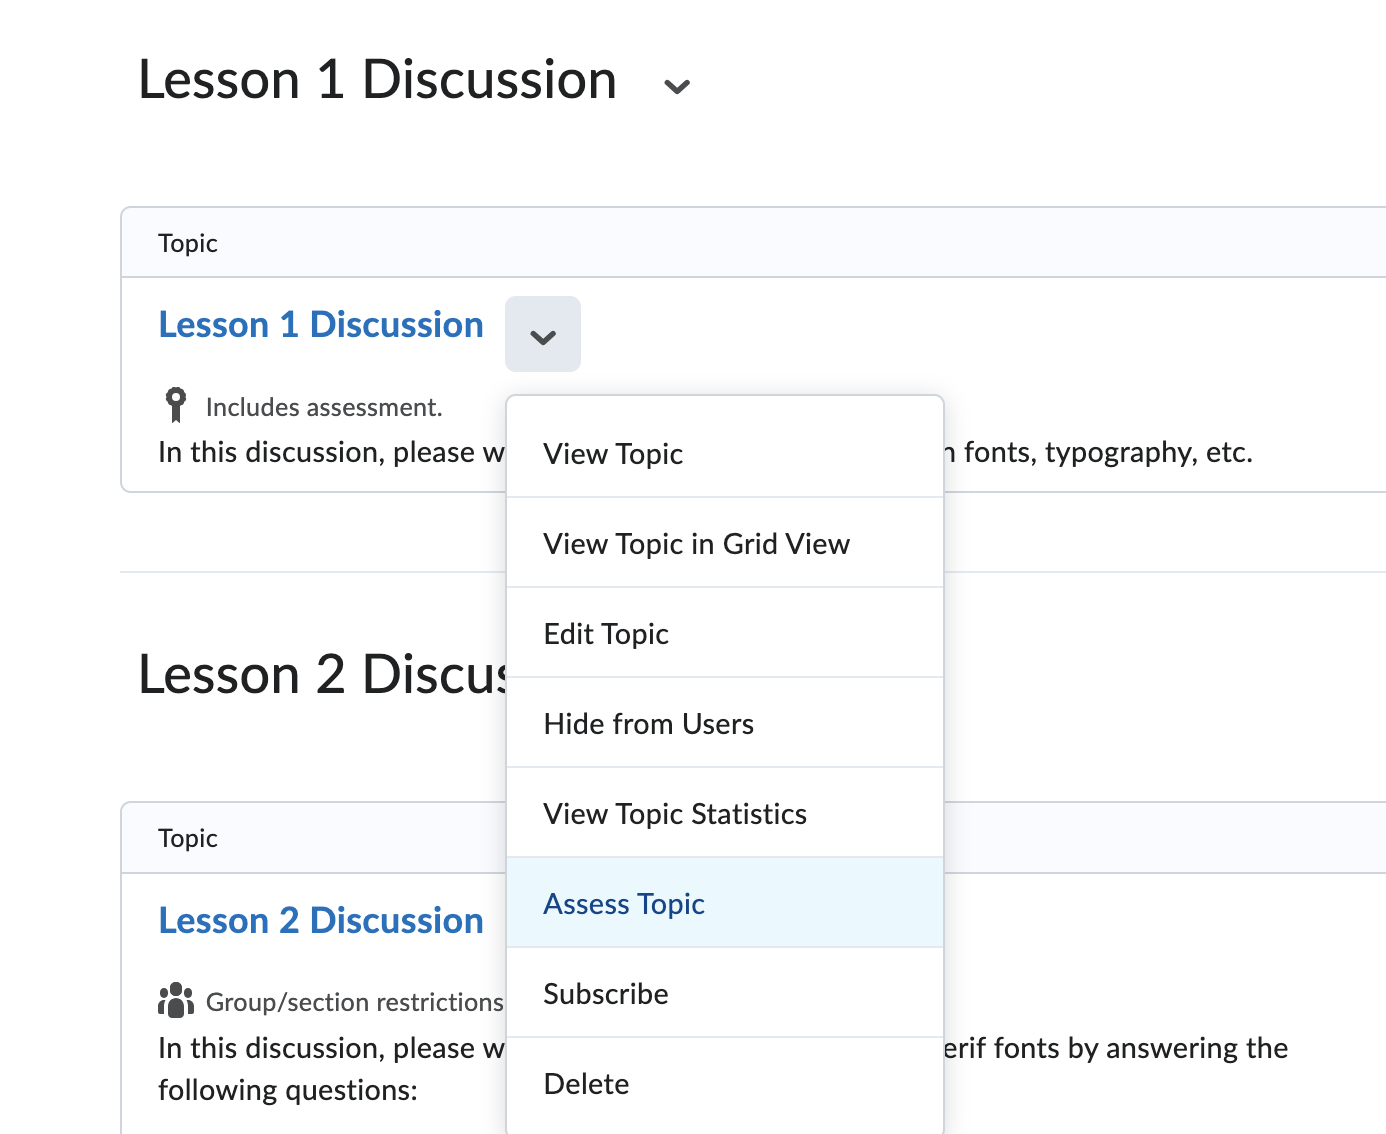
No matter whether a topic has included assessment or not, you can click on “View Topic Statistics” from this menu (shown above) to view overall statistics as well as student performance in this topic. Clicking on the down arrow next to the forum title will also have a similar menu with the option to “View Forum Statistics”.
For more information, please see this document.
last updated: 01/26/2024