Overview
- Login to your NYU account on Zoom and record your lecture
- Ensure that your Internet connection is stable
- Record in a quiet, well-lit location
- Frame yourself properly on camera to make your recording look as professional as possible
- Turn on settings for recordings to be downloadable
Personal Zoom Meeting Room
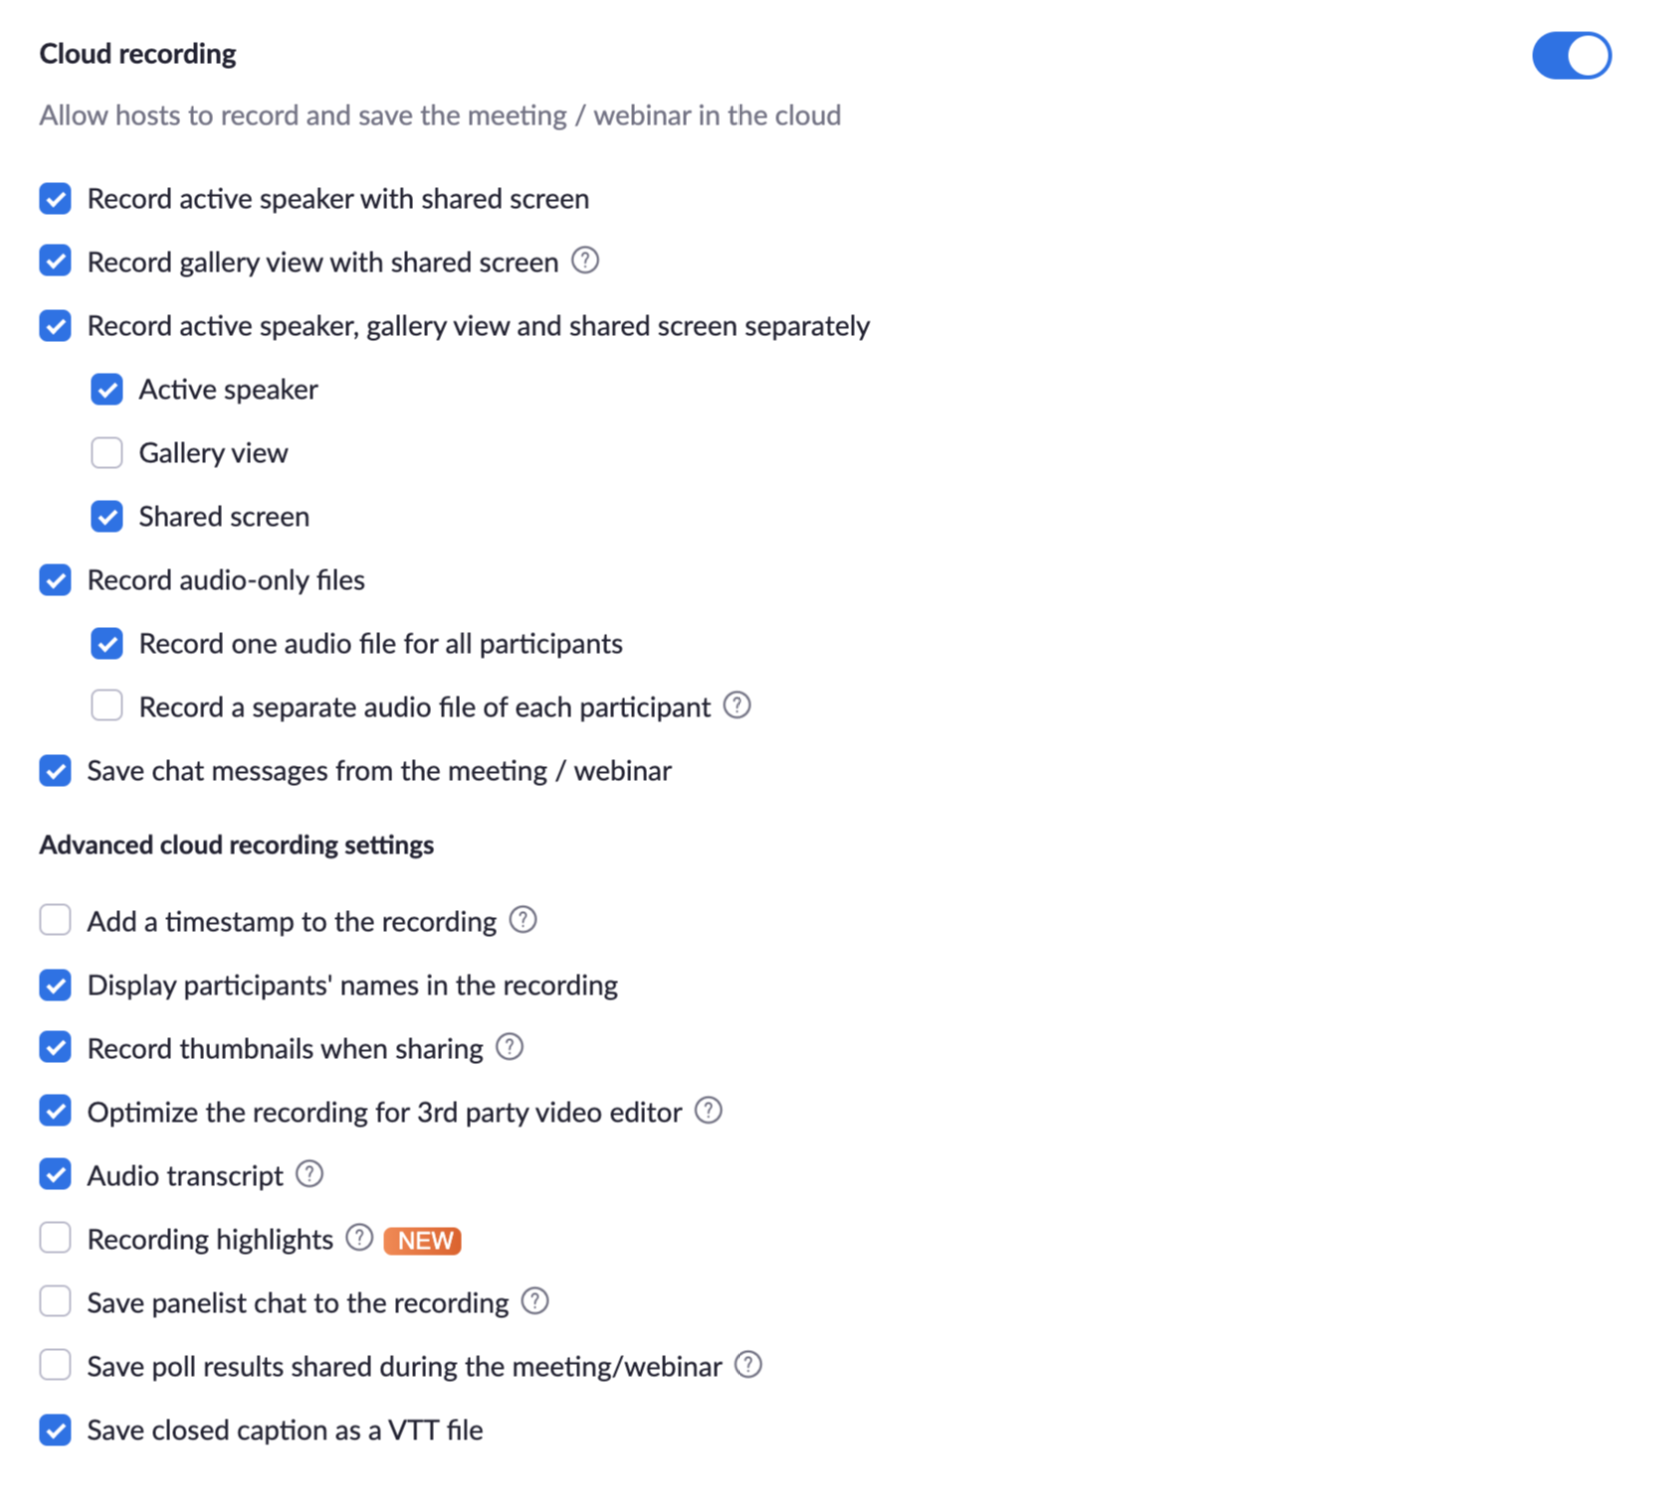
After you login to your zoom account, click on “Settings” from the left navigation menu. Next, click on the “Recording” tab.
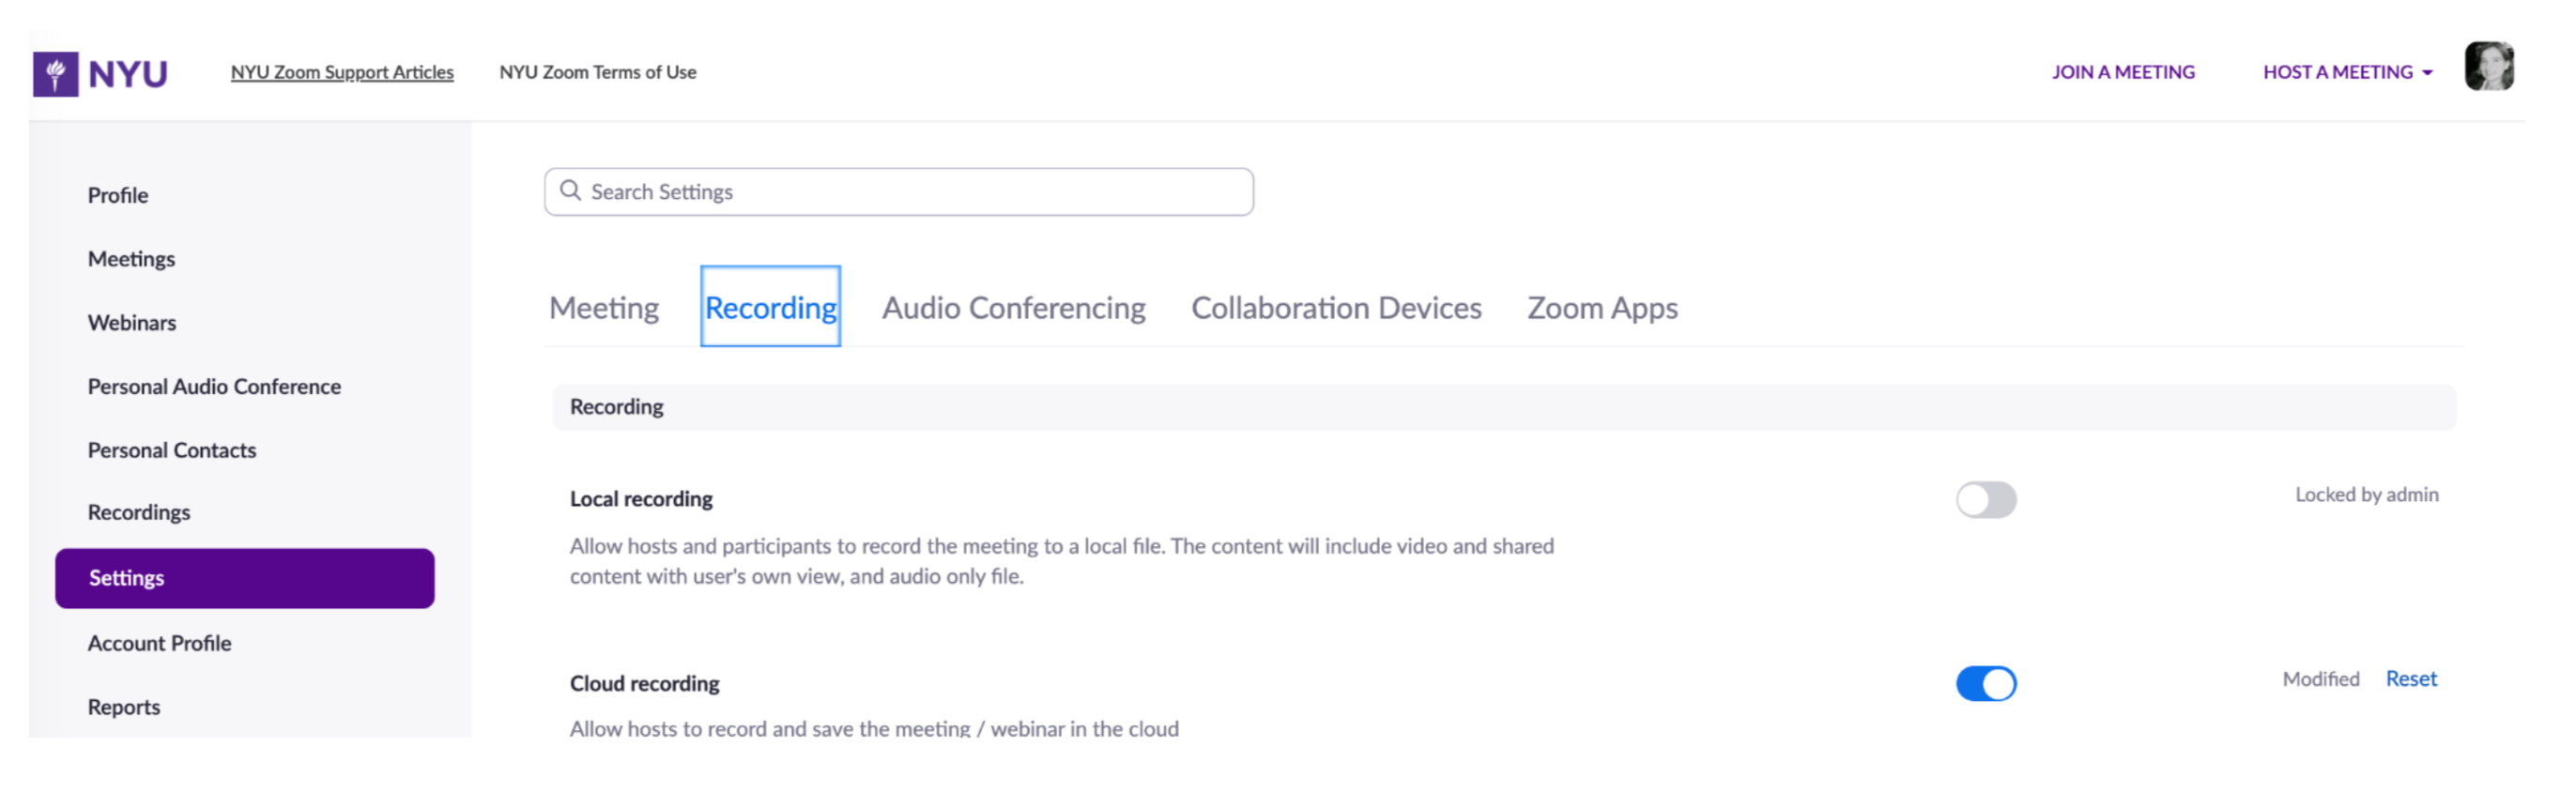
Be sure to have the attached settings checked.
Video Placement
To make your video look professional, frame your video so that you are positioned in the center. Leave a space between the top of your head and the upper frame of your video. Have your camera positioned where you are able to look straight into the camera, opposed to looking down or looking up.
How to Allow Recordings to be Downloaded
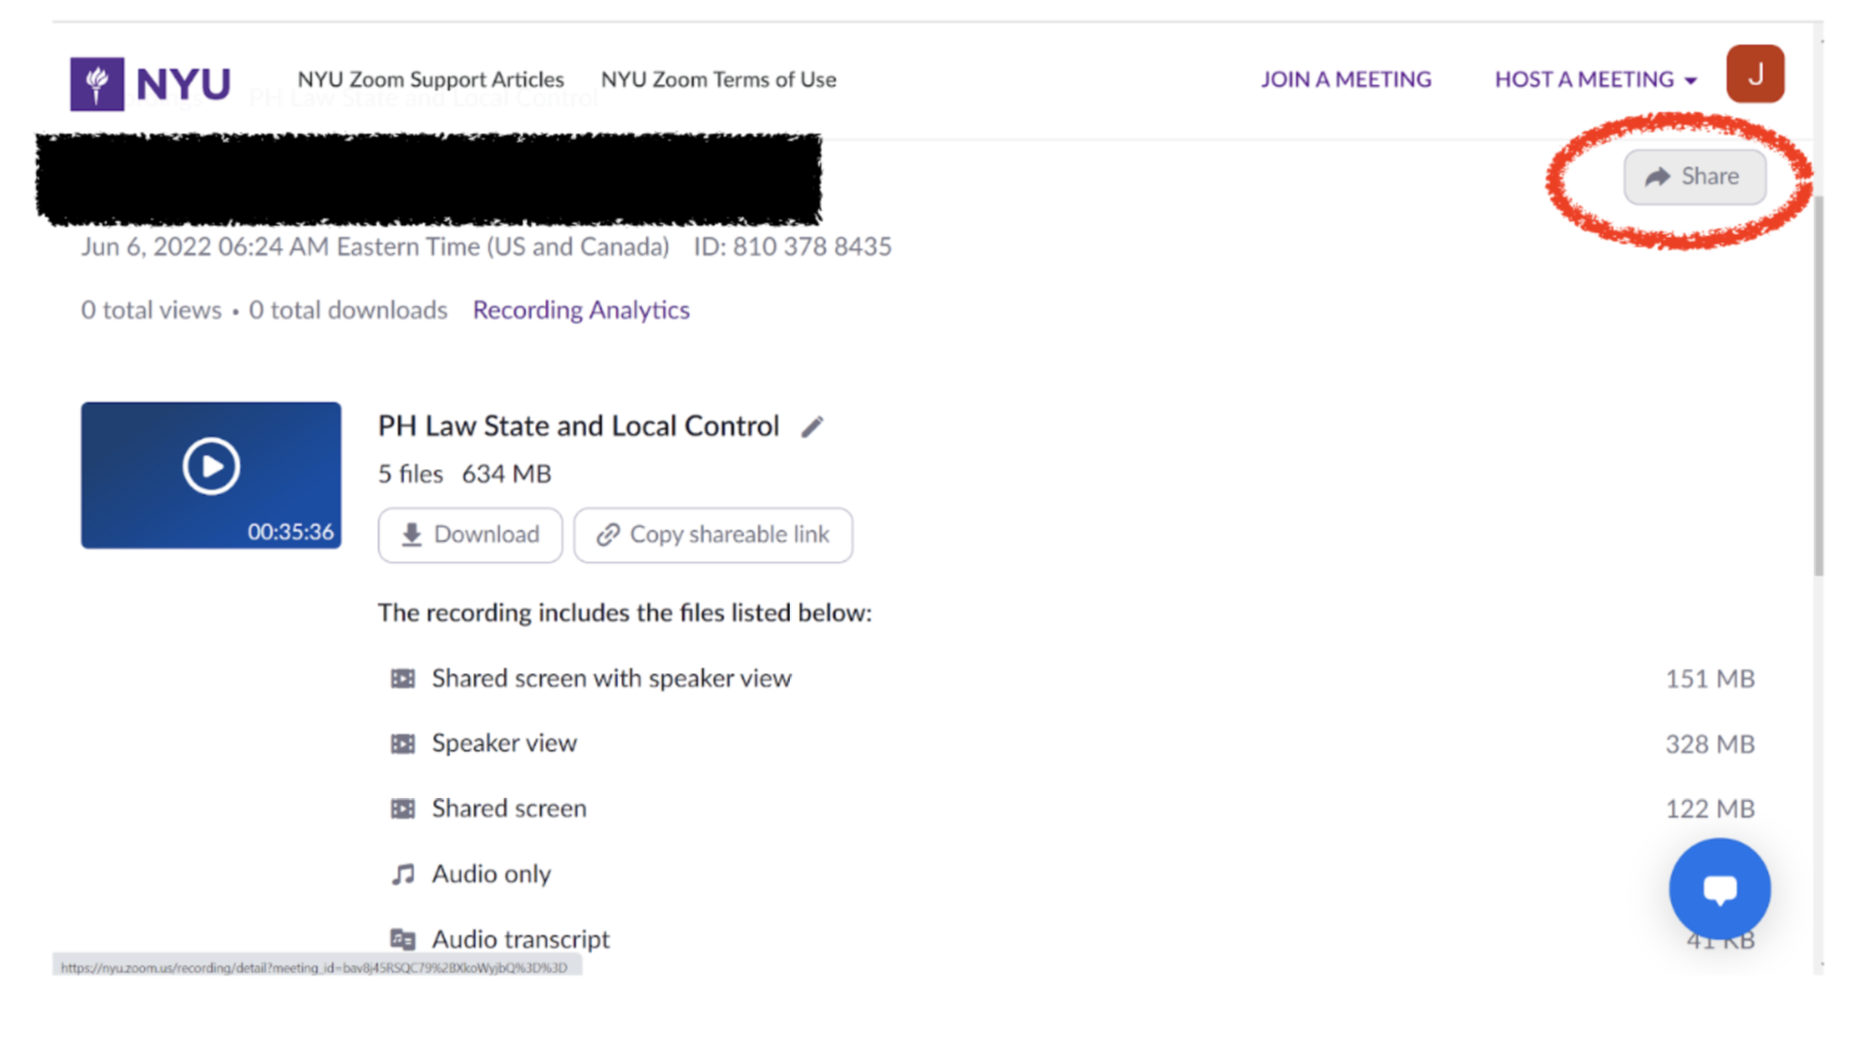
When you are ready to share your recording, you will need to go into each recording and allow us the ability to download your video. You can find all of your recordings under “Recordings” from the left navigation menu when you login to your NYU zoom account.
- Please kindly change the title of your recording so we know what the topic of your video is. To do so, click on the recording. Once a new window appears, click the edit icon next to the name and change the title.

- Afterwards, click on the “Share” button at the top-right of the page.
- A settings window on sharing configuration will appear. Check the box “Viewers can download”, or make sure that setting is on.
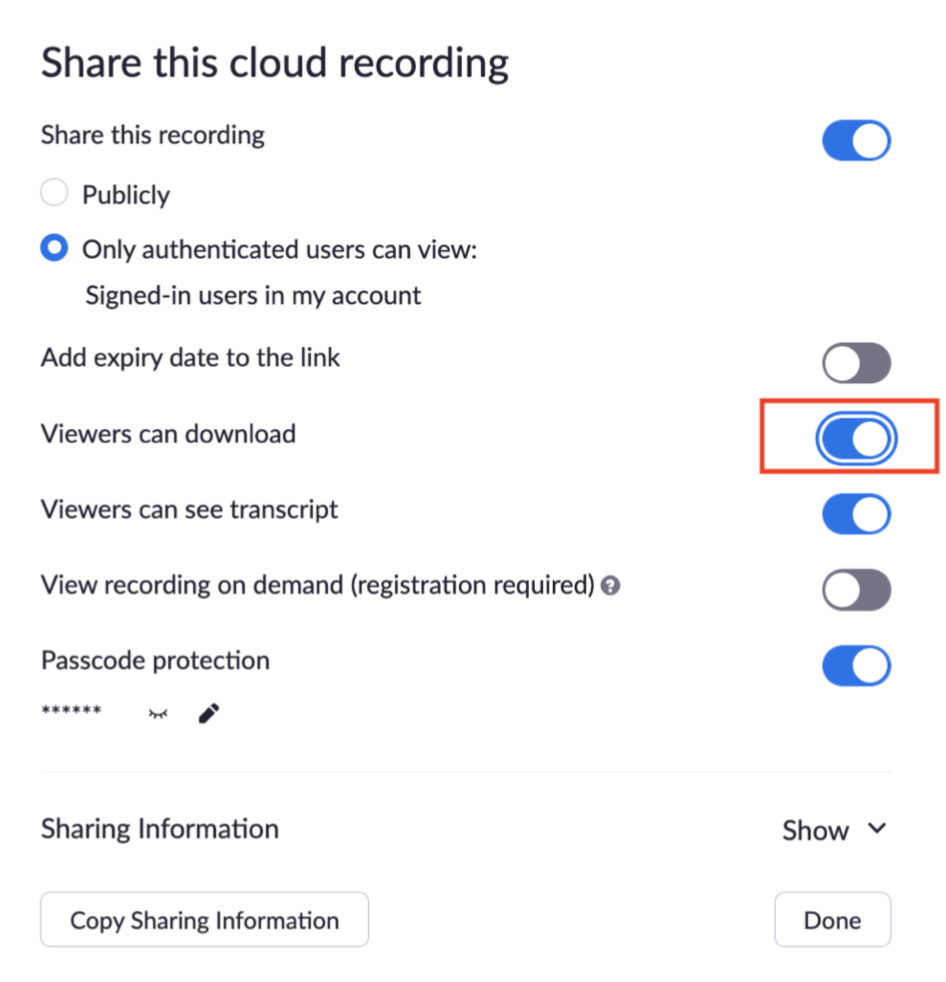
- Once that has been done you can share the link (“Copy Sharing Information”) with our team.